Jika Anda sedang mencari mengubah ukuran gambar tanpa kehilangan kualitas, Anda mungkin tidak memerlukan daftar alat lain yang tidak jelas. Anda memerlukan alur kerja praktis yang memecahkan satu masalah nyata: pengguna mengubah ukuran gambar dengan menebak dimensi, memperluas rasio aspek, memperbesar file kecil, atau mengompresi ulang gambar yang sama berulang kali. Panduan ini menjelaskan cara mengambil keputusan gambar yang tepat, cara menggunakan Resizo Image Resizer, dan cara menghindari kesalahan yang secara diam-diam merusak kualitas, privasi, atau kecepatan halaman.
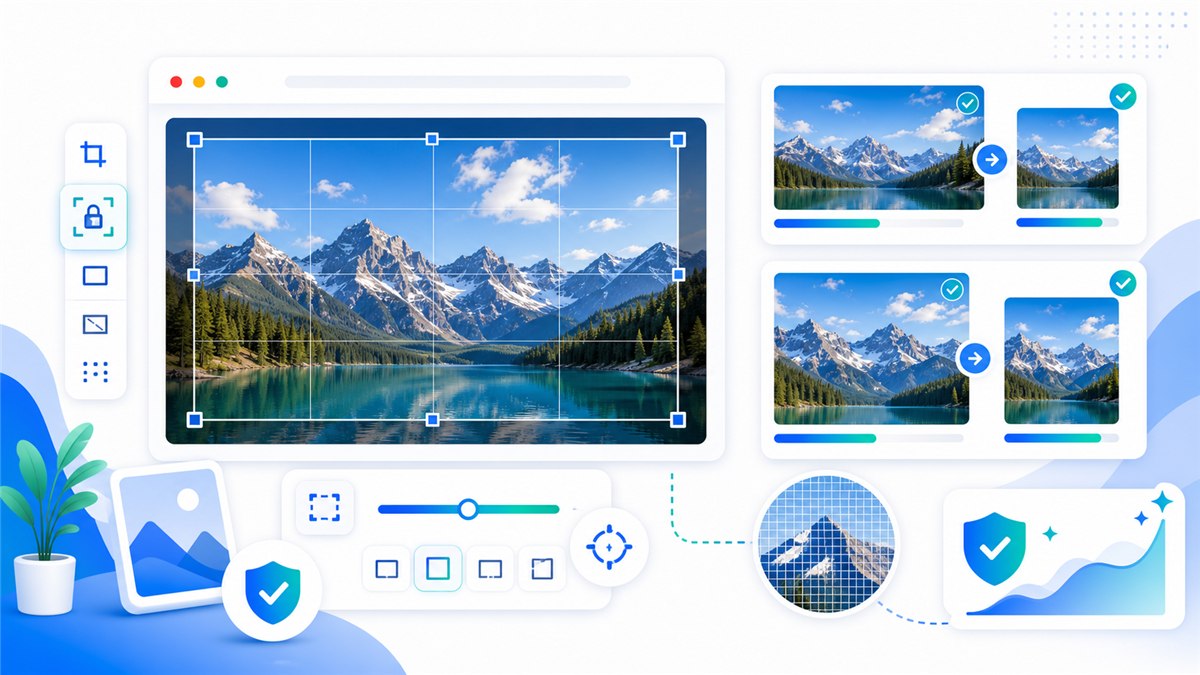
Perkenalan
Cara Mengubah Ukuran Gambar Tanpa Kehilangan Kualitas penting karena karya gambar jarang hanya sekedar tugas estetika. Satu foto berukuran besar dapat memperlambat situs web, menggagalkan pengunggahan formulir, mengekspos konten pribadi, atau membuat galeri produk tidak konsisten. Satu ekspor yang dikompresi secara berlebihan dapat membuat wajah terlihat seperti lilin, teks tidak dapat dibaca, dan grafis merek menjadi tidak profesional.
Pendekatan yang lebih baik adalah sederhana: mulailah dengan tujuan sebenarnya, tetapkan dimensi piksel terlebih dahulu, pilih format yang sesuai dengan konten, ekspor sekali, dan periksa hasilnya sebelum dipublikasikan atau dibagikan. Resizo dibangun berdasarkan alur kerja itu. Ini menjalankan operasi gambar umum di browser, yang berarti tugas pengubahan ukuran, kompresi, konversi, dan pratinjau yang didukung dapat dilakukan secara lokal dan tidak memerlukan alur pengunggahan terlebih dahulu.
Untuk file sensitif, pemrosesan lokal sangatlah penting. Gambar pribadi dapat berisi wajah, lokasi, dokumen, prototipe produk, tangkapan layar internal, atau metadata. Meskipun layanan cloud sah, model privasinya berbeda dengan alur kerja lokal browser. Kebiasaan paling aman adalah menghindari mengunggah dokumen asli kecuali pengunggahan diperlukan dan Anda memercayai persyaratan layanan.
Apa Cara Mengubah Ukuran Gambar Tanpa Kehilangan Kualitas?
Mengubah ukuran gambar tanpa kehilangan kualitas berarti mengubah dimensi piksel gambar untuk tujuan tertentu — pahlawan situs web, galeri produk, lampiran email, atau formulir unggahan — sekaligus menjaga hasilnya tetap terlihat tajam. Kualitas akan bertahan jika tiga aturan dipatuhi: memperkecil ukuran aslinya dibandingkan memperbesar, mempertahankan rasio aspek agar tidak ada yang melebar, dan mengekspor sekali dalam format yang sesuai dengan konten, yaitu JPEG atau WebP untuk foto dan PNG untuk grafik dan teks. Alur kerja lengkap terbagi menjadi empat keputusan: dimensi, format, kualitas, dan privasi. Browser modern dapat menangani keempatnya secara lokal. Canvas API, yang didokumentasikan oleh MDN, mengekspor PNG di setiap browser dan JPEG serta WebP di sebagian besar browser, itulah sebabnya alat berbasis browser seperti Pengubah ukuran gambar Resizo dapat menurunkan skala foto ponsel 5 MB seluruhnya di perangkat Anda sendiri, tanpa unggahan dan tanpa server bolak-balik.
Secara praktis, alur kerja mencakup empat keputusan: dimensi, format, kualitas, dan privasi. Dimensi menentukan berapa banyak piksel yang terdapat pada gambar akhir. Format menentukan apakah file harus berupa JPEG, PNG, WebP, atau jenis lainnya. Kualitas mengontrol trade-off antara kompresi dan detail visual. Privasi memutuskan apakah gambar asli harus tetap ada di perangkat atau diunggah ke prosesor cloud.
Browser modern mendukung ekspor gambar melalui API web. Dokumen MDN yang diekspor kanvas dapat membuat gumpalan gambar dan format seperti PNG diperlukan sementara JPEG dan WebP didukung secara luas oleh banyak browser. Itulah sebabnya alat yang mengutamakan browser dapat menangani banyak tugas gambar sehari-hari tanpa harus bolak-balik ke server.
Mengapa Itu Penting
Mengubah ukuran gambar dengan benar itu penting karena kesalahan mahal dan mudah diabaikan. Foto ponsel berukuran 5 MB yang diunggah langsung ke situs web memperlambat setiap tampilan halaman; pemindaian ID yang terlalu dikompresi dapat membuat teksnya tidak dapat dibaca oleh formulir yang memerlukannya; kumpulan produk yang tidak cocok membuat keseluruhan katalog terlihat kurang dapat dipercaya. Penyebab utamanya biasanya sama: gambar diekspor pada dimensi piksel yang salah atau dikompresi ulang lebih sering dari yang diperlukan, dan setiap ekspor lossy ekstra akan menumpuk lebih banyak kerusakan pada file. Perbaikannya lebih bersifat prosedural daripada artistik — ubah ukuran dari aslinya, pertahankan rasio aspek tetap terkunci, cocokkan ukuran keluaran dengan ukuran tampilan sebenarnya, dan ekspor tepat satu kali dalam format yang sesuai. Karena pengubah ukuran gambar Resizo memproses file secara lokal di browser alih-alih mengunggahnya, gambar sensitif seperti ID, karya klien, dan foto produk yang tidak dipublikasikan tidak akan pernah meninggalkan perangkat Anda.
mengubah ukuran dari aslinya, mempertahankan rasio aspek, memilih ukuran keluaran yang tepat, dan mengekspor sekali menggunakan format yang sesuai. Itulah alasan utama untuk menggunakan alur kerja yang terfokus daripada hanya menebak-nebak. Tujuannya bukan untuk mengejar angka sekecil mungkin. Tujuannya adalah untuk membuat file yang cukup kecil, cukup jelas, berukuran tepat, dan sesuai dengan tingkat privasi konten.
Pusat Google Penelusuran juga merekomendasikan penggunaan elemen gambar HTML standar, teks alternatif yang berguna, format yang didukung, data terstruktur, dan halaman gambar yang dioptimalkan untuk kecepatan dan kualitas. Dengan kata lain, pengoptimalan gambar bukan hanya tugas desain. Ini memengaruhi aksesibilitas, visibilitas pencarian, kepercayaan pengguna, dan konversi.
Manfaat Utama
- Anda mengurangi waktu unggah yang terbuang karena pengubahan ukuran gambar yang menjaga kualitas terjadi sebelum file mencapai situs web, formulir, atau CMS.
- Anda membuat keluarannya dapat diprediksi: dimensi yang tepat, ukuran file yang masuk akal, dan format yang sesuai dengan tujuan.
- Anda melindungi gambar asli dengan mengekspor salinan terpisah yang dioptimalkan alih-alih mengedit satu-satunya versi yang Anda miliki.
- Anda menghindari kerusakan kualitas yang umum seperti rasio aspek yang melebar, kompresi berulang, dan peningkatan yang tidak perlu.
- Anda membuat gambar yang lebih mudah diunduh pengguna dan lebih mudah dipahami mesin pencari bila dikombinasikan dengan nama file dan teks alternatif yang bagus.
Bagi desainer, kreator, blogger, penjual ecommerce, pelajar, dan tim kantor, manfaat terbesar biasanya adalah kontrol. Anda memutuskan apa yang tersisa dari perangkat, apa yang diubah ukurannya, format apa yang diekspor, dan tingkat kualitas apa yang dapat diterima. Kontrol tersebut sulit didapat ketika setiap tugas gambar kecil dimulai dengan pengunggahan wajib dan ekspor kotak hitam.
Panduan Langkah demi Langkah
- Buka Resizo Image Resizer dan pilih gambar asli dari perangkat Anda.
- Identifikasi target sebenarnya: kecepatan situs web, batas lampiran email, unggahan formulir, foto profil, atau ukuran gambar sosial.
- Atur dimensi piksel terlebih dahulu. Mengurangi foto ponsel berukuran 4000 px menjadi 1600 px biasanya menghemat lebih dari sekadar perubahan kualitas.
- Biarkan rasio aspek tetap terkunci kecuali Anda sengaja memangkas ke ukuran platform.
- Pilih WebP untuk penggunaan web, JPEG untuk kompatibilitas foto secara umum, dan PNG untuk transparansi atau tangkapan layar.
- Mulailah dengan kualitas sekitar 75-85 untuk foto, lalu pratinjau detailnya sebelum mengunduh.
- Unduh salinan baru yang dioptimalkan dan jaga agar salinan asli tidak tersentuh.
- Buka hasilnya pada ukuran tampilan normal dan zoom 100 persen sebelum mengunggahnya ke tempat penting.
Pengaturan yang Direkomendasikan
| Kasus penggunaan | Format/alat yang direkomendasikan | Sasaran ukuran | Praktik terbaik |
|---|---|---|---|
| Pahlawan situs web | WebP atau JPEG | Lebar 1600-2000 piksel | Cukup besar untuk layar retina, bukan ukuran kamera penuh |
| gambar blog | WebP atau JPEG | Lebar 1200-1600 piksel | Detail keseimbangan dan pemuatan cepat |
| Foto profil | JPEG atau WebP | 800 x 800 atau platform yang telah ditetapkan sebelumnya | Pangkas kotak sebelum mengekspor |
| Unggah formulir | jpeg | Cocokkan batas piksel/file yang diminta | Hindari mengompresi dokumen yang dapat dibaca secara berlebihan |
Pengaturan ini merupakan titik awal, bukan hukum. Potret, tangkapan layar, logo transparan, dan foto produk pasar semuanya berperilaku berbeda. Selalu uji beberapa file representatif sebelum memproses folder besar.
Praktik Terbaik
- Mulailah dari dokumen asli dengan kualitas terbaik yang Anda miliki. Mengubah ukuran salinan yang buruk biasanya memperkuat blok blur dan kompresi.
- Tetapkan dimensi sebelum kualitas. Jumlah piksel biasanya merupakan pendorong terbesar ukuran file.
- Gunakan satu izin ekspor. Membuka kembali dan mengompresi ulang keluaran yang sama berulang kali menyebabkan kerusakan yang terlihat.
- Simpan set pengujian kecil dengan jenis gambar berbeda: potret, produk, tangkapan layar, foto gelap, dan grafik transparan.
- Gunakan nama deskriptif seperti resize-passport-photo.jpg atau product-main-1200.webp, bukan IMG_4829-final-final.jpg.
- Simpan file yang diekspor di dekat salinan yang relevan di halaman dan gunakan teks alternatif alami, dengan mengikuti panduan SEO gambar Google.
Satu kebiasaan ahli membuat perbedaan besar: beri nama keluaran berdasarkan tujuan, bukan suasana hati. Sebuah file bernama beranda-hero-1600.webp memberi tahu editor masa depan apa sebenarnya itu. Sebuah file bernama final-baru-2.jpg tidak memberi tahu mereka apa pun dan biasanya menyebabkan pekerjaan duplikat.
Kesalahan Umum
- Mengunggah foto sensitif ke alat sebelum memeriksa bagaimana layanan memproses dan menyimpan file.
- Memaksakan lebar dan tinggi tetap yang mendistorsi orang, produk, logo, atau dokumen.
- Meningkatkan gambar sumber kecil dan mengharapkan detail sebenarnya muncul. Peningkatan skala dapat memperbesar piksel, namun tidak dapat membuat ulang informasi yang hilang.
- Menggunakan PNG untuk setiap foto. PNG sangat baik untuk transparansi dan grafik yang tajam, tetapi foto sering kali berukuran terlalu besar.
- Mengabaikan kasus penggunaan terakhir. Master kualitas cetak dan pratinjau web cepat adalah file berbeda dengan persyaratan berbeda.
- Menghapus dokumen asli terlalu cepat. Selalu simpan file sumber hingga set yang dioptimalkan aktif dan diverifikasi.
Kesalahan paling umum adalah mengoptimalkan metrik yang salah. File terkecil tidak selalu merupakan file terbaik. File terbaik adalah file yang dimuat dengan cepat, terlihat sesuai dengan ukuran yang dilihat pengguna, memenuhi persyaratan tujuan, dan tidak memaparkan informasi pribadi lebih dari yang diperlukan.
Kiat Tingkat Lanjut
- Buat dua ekspor untuk aset web penting: master 1600 px untuk layar besar dan versi lebih kecil 800 px untuk thumbnail atau kartu.
- Untuk e-niaga, buatlah pemotongan dan latar belakang yang konsisten sebagai bagian dari proses sebelum kompresi. Konsistensi visual seringkali sama pentingnya dengan ukuran file.
- Untuk tangkapan layar, uji PNG dan WebP. Tangkapan layar yang berisi banyak teks dapat terlihat lebih buruk jika dikompresi seperti foto biasa.
- Untuk formulir dengan batasan KB yang ketat, ubah ukuran dimensi terlebih dahulu, lalu turunkan kualitas secara bertahap dalam langkah-langkah kecil.
- Untuk alur kerja pribadi, muat alat, putuskan sambungan dari internet, dan selesaikan pemrosesan lokal setelah halaman terbuka.
- Dokumentasikan pengaturan pilihan Anda sehingga anggota tim mengekspor dengan cara yang sama setiap saat.
Jika Anda mengelola alur kerja berulang, buatlah lembar preset internal kecil. Sertakan lebar target, format keluaran, rentang kualitas, pola penamaan, dan daftar periksa tinjauan. Lembar itu menghemat lebih banyak waktu daripada menebak pengaturan setiap kali kumpulan baru tiba.
Contoh Nyata dan Kasus Penggunaan
| Skenario | Masalah | Alur kerja Resizo yang direkomendasikan |
|---|---|---|
| Lamaran pekerjaan | Foto ponsel berukuran 5,8 MB tetapi portal mengizinkan 500 KB. | Ubah ukuran sisi terpanjang menjadi 1200 piksel, ekspor JPEG dengan kualitas 78, dan periksa detail wajah. |
| Toko daring | Tiga puluh gambar produk memiliki ukuran berbeda dan terlalu berat. | Ubah ukuran batch menjadi kanvas persegi yang konsisten, ekspor WebP, dan simpan dokumen asli. |
| Penerbitan blog | Gambar pahlawan memiliki lebar 4032 piksel dan memperlambat halaman. | Ubah ukuran menjadi lebar 1600 px, ekspor WebP, dan tambahkan nama file deskriptif dan teks alternatif. |
| Dokumen pribadi | Gambar ID yang dipindai harus lebih kecil untuk formulir. | Gunakan alur kerja tanpa unggahan, ubah ukurannya hanya sesuai kebutuhan, dan hapus salinan yang diekspor setelah pengiriman jika perlu. |
Contoh sebelum dan sesudah
| Sebelum | Tindakan | Hasil yang khas | Mengapa ini berhasil |
|---|---|---|---|
| Foto ponsel, 4032 x 3024, 4,8 MB | Ubah ukuran menjadi lebar 1600 px dan ekspor WebP/JPEG dengan kualitas 80 | Seringkali 250-700 KB | Terbaik untuk blog, portofolio, dan unggahan web dasar |
| Tangkapan layar PNG, lebar 2880 piksel, 2,4 MB | Ubah ukuran untuk menampilkan ukuran dan menguji PNG vs WebP | Seringkali 300-900 KB | Membuat teks UI tetap dapat dibaca sambil menghapus piksel yang terlalu besar |
| Kumpulan gambar produk, dimensi campuran | Ubah ukuran batch menjadi kanvas yang konsisten dan ganti nama file | Aset galeri yang konsisten | Meningkatkan UX dan menghindari lompatan tata letak |
| Foto profil pribadi | Pangkas persegi, ubah ukuran ke ukuran platform, ekspor secara lokal | Gambar profil kecil dan bersih | Hindari mengunggah foto asli beresolusi tinggi |
Contoh sebelum dan sesudah harus diperlakukan sebagai rentang yang realistis, bukan jaminan. Penghematan kompresi bergantung pada gambar asli, noise, dimensi, format, dan seberapa banyak detail visual yang harus dipertahankan. Alur kerjanya masih dapat diandalkan: ubah ukuran piksel yang tidak perlu terlebih dahulu, pilih format konten, lalu sesuaikan kualitas hanya sejauh kasus penggunaan memungkinkan.
Alur Kerja Praktis Dengan Resizo Image Resizer
Membuka Pengubah Gambar Resizo, tambahkan satu file representatif, dan jalankan tes kecil. Periksa pratinjau. Jika hasilnya terlihat benar, ulangi pengaturan yang sama pada batch penuh. Untuk file sensitif, lakukan ini sebelum mengirim gambar melalui email, formulir, unggahan CMS, atau portal klien. Untuk aset web publik, gabungkan ekspor dengan nama file deskriptif, teks alternatif yang berguna, dan dimensi gambar dalam HTML untuk mengurangi pergeseran tata letak.
Jika kualitas penting, bandingkan pada dua tingkat zoom. Pertama-tama lihat gambar dengan ukuran sebenarnya yang akan dilihat pengguna. Kemudian periksa pada zoom 100 persen untuk teks, wajah, tepi produk, dan transparansi. Jika lolos kedua pemeriksaan tersebut, file biasanya sudah siap.
Sumber otoritas eksternal patut diperiksa
| Sumber | Mengapa ini berguna | URL |
|---|---|---|
| MDN HTMLCanvasElement.toBlob | Menjelaskan bagaimana kanvas browser mengekspor gumpalan gambar, format, dan pengaturan kualitas. | https://developer.mozilla.org/en-US/docs/Web/API/HTMLCanvasElement/toBlob |
| web.dev Pelajari Gambar | Referensi praktis untuk format gambar web, gambar responsif, dan kinerja. | https://web.dev/learn/images |
| Praktik Terbaik SEO Gambar Google | Panduan Google untuk gambar yang dapat ditemukan, teks alternatif, data terstruktur, dan halaman gambar cepat. | https://developers.google.com/search/docs/appearance/google-images |
Pertanyaan yang Sering Diajukan
Apa itu Cara Mengubah Ukuran Gambar Tanpa Kehilangan Kualitas?
Cara Mengubah Ukuran Gambar Tanpa Kehilangan Kualitas adalah alur kerja praktis untuk mengubah ukuran gambar sekaligus menghindari keburaman, pikselasi, distorsi, dan kompresi yang buruk. Tujuannya adalah untuk menciptakan gambar yang lebih kecil atau lebih pas dengan tetap mempertahankan detail yang penting bagi tujuan tersebut.
Bisakah saya melakukan ini dengan Resizo Image Resizer?
Ya. Resizo Image Resizer dirancang untuk alur kerja yang tepat ini. Anda dapat memilih pengaturan dimensi, format, dan kualitas, lalu mengunduh salinan yang dioptimalkan tanpa mengubah aslinya.
Apakah Resizo mengunggah gambar saya?
Untuk alat browser Resizo yang didukung, gambar diproses secara lokal di browser Anda. Artinya, file asli tetap ada di perangkat Anda selama pengubahan ukuran, kompresi, konversi, dan pratinjau.
Format apa yang harus saya pilih?
Gunakan WebP untuk sebagian besar halaman web modern, JPEG untuk kompatibilitas foto yang luas, dan PNG saat Anda memerlukan transparansi, grafik UI yang tajam, atau detail tangkapan layar yang tepat.
Apakah pengurangan ukuran file akan selalu menurunkan kualitas?
Tidak selalu terlihat. Jika Anda mengurangi piksel yang tidak perlu terlebih dahulu dan menggunakan pengaturan kualitas yang masuk akal, file dapat menjadi jauh lebih kecil namun tetap terlihat sama pada ukuran tampilan normal.
Pengaturan kualitas apa yang terbaik?
Untuk foto, mulailah sekitar 75-85 dan periksa hasilnya. Untuk tangkapan layar atau grafik, uji PNG dan WebP karena kompresi foto biasa dapat membuat teks dan tepinya terlihat kasar.
Bisakah saya memproses banyak gambar sekaligus?
Ya, khususnya untuk alur kerja batch. Batasan praktisnya bergantung pada browser dan memori perangkat Anda karena alat lokal menggunakan mesin Anda sendiri, bukan antrean server.
Haruskah saya menghapus yang asli setelah mengekspor?
Tidak. Simpan yang asli hingga gambar akhir telah diunggah, ditinjau, dan disetujui. Simpan ekspor yang dioptimalkan dalam folder terpisah sehingga Anda dapat membuatnya kembali nanti.
Bagaimana cara menghindari keluaran buram?
Jangan memperbesar file kecil, mengunci rasio aspek, mengekspor dari aslinya, dan memeriksa hasilnya pada zoom 100 persen sebelum menggunakannya dalam produksi.
Apakah ini bagus untuk SEO?
Ya bila dikombinasikan dengan ukuran file yang cepat, nama file yang deskriptif, teks alternatif yang berguna, elemen gambar HTML yang tepat, dan konten halaman yang relevan di dekat gambar.
Kesimpulan
Cara Mengubah Ukuran Gambar Tanpa Kehilangan Kualitas bukanlah tentang mengejar angka kompresi ajaib. Ini tentang memilih hasil yang paling aman dan berguna untuk pekerjaan itu. Mulailah dengan tujuan, ubah ukuran piksel sebelum menurunkan kualitas, pilih format yang benar, dan lindungi dokumen asli pribadi. Resizo Image Resizer memberi Anda alur kerja lokal yang cepat untuk melakukan hal itu tanpa mengubah tugas gambar sederhana menjadi proses yang banyak mengunggah.
Gunakan Resizo bila Anda menginginkan kontrol praktis: dimensi, format, kualitas, privasi, dan kecepatan batch. Gunakan alat pesaing atau cloud hanya jika fitur spesifiknya sepadan dengan unggahan dan alur kerja akun untuk kasus penggunaan Anda.
Selesaikan dengan Resizo Image Resizer
mengubah ukuran dari aslinya, mempertahankan rasio aspek, memilih ukuran keluaran yang tepat, dan mengekspor sekali menggunakan format yang sesuai
Coba Resizo Gratis