Wenn Sie suchen Resizo gegen iLoveIMG, benötigen Sie wahrscheinlich keine weitere vage Werkzeugliste. Sie benötigen einen praktischen Workflow, der ein echtes Problem löst: Benutzer möchten wissen, ob eine umfassende serverbasierte Bildsuite oder ein lokales Browser-First-Tool für ihren Workflow besser ist. In diesem Leitfaden erfahren Sie, wie Sie die richtige Bildentscheidung treffen, wie Sie Resizo Image Resizer verwenden und wie Sie Fehler vermeiden, die stillschweigend die Qualität, den Datenschutz oder die Seitengeschwindigkeit beeinträchtigen.
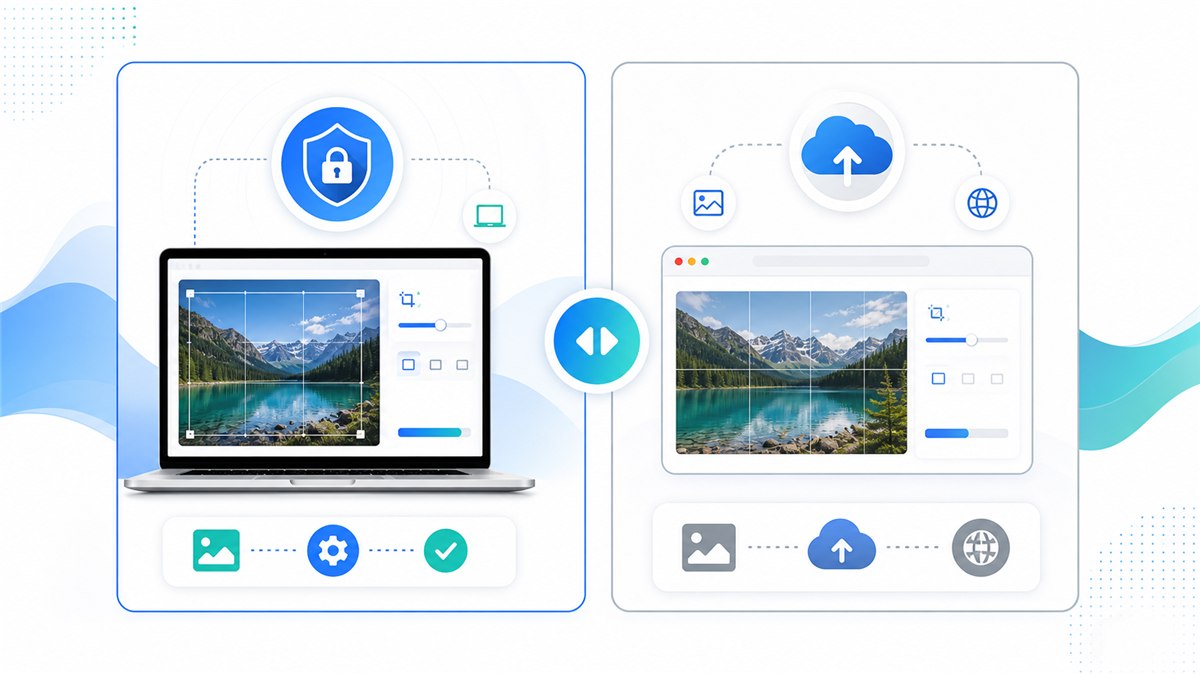
iLoveIMG vs. Resizo Vergleichstabelle
| Entscheidungspunkt | Helfen | iLoveIMG |
|---|---|---|
| Verarbeitungsmodell | Lokale Browser-First-Verarbeitung für unterstützte Arbeitsabläufe | Cloud-/Serververarbeitung für die meisten Tools |
| Beste Passform | Private Größenänderung, schnelle Ausgabe, Arbeitsabläufe ohne Konto | Umfangreiches Bild-Toolkit mit vielen Cloud-Funktionen |
| Kostenlose Limits | Keine strenge serverseitige Upload-Beschränkung, da keine Dateien hochgeladen werden | Auf der offiziellen Preisseite sind die eingeschränkte Verarbeitung bei Basic und höhere Limits bei kostenpflichtigen Tarifen aufgeführt |
| Privatsphäre-Aspekt | Originaldateien bleiben während lokaler Aufgaben auf dem Gerät | Uploads werden vom Dienst verwaltet. Lesen Sie daher die Datenschutz- und Verarbeitungsbedingungen |
| Ausgangskontrolle | Ändern Sie Größe, Qualität, Format und Stapeleinstellungen in einem einfachen Ablauf | Leistungsstarker Satz separater Bildtools mit planbasierten Leistungsunterschieden |
Dieser Vergleich soll nicht dazu dienen, jeden Arbeitsablauf zu einer Entscheidung zu machen, bei der der Gewinner alles bekommt. iLoveIMG kann nützlich sein, wenn der Cloud-Workflow, die Automatisierung oder der Funktionsumfang Ihren Anforderungen entspricht. Resizo ist die bessere Standardeinstellung, wenn das Originalbild auf Ihrem Gerät bleiben soll, wenn Sie vor der Komprimierung genaue Abmessungen benötigen oder wenn Sie ein schnelles Ergebnis ohne Kontoreibung wünschen.
Einführung
Resizo vs. iLoveIMG: Datenschutz, Geschwindigkeit, Grenzen und beste Anwendungsfälle sind wichtig, da Bildbearbeitung selten nur eine ästhetische Aufgabe ist. Ein einzelnes übergroßes Foto kann eine Website verlangsamen, das Hochladen eines Formulars fehlschlagen, private Inhalte offenlegen oder inkonsistente Produktgalerien erzeugen. Ein einziger überkomprimierter Export kann dazu führen, dass Gesichter wächsern, Texte unlesbar und Markengrafiken unprofessionell wirken.
Der bessere Ansatz ist einfach: Beginnen Sie mit dem eigentlichen Ziel, legen Sie zuerst die Pixelabmessungen fest, wählen Sie ein Format, das zum Inhalt passt, exportieren Sie es einmal und überprüfen Sie das Ergebnis, bevor Sie es veröffentlichen oder teilen. Resizo basiert auf diesem Workflow. Es führt allgemeine Bildvorgänge im Browser aus, was bedeutet, dass unterstützte Größenänderungs-, Komprimierungs-, Konvertierungs- und Vorschauaufgaben lokal ausgeführt werden können, anstatt dass eine Upload-First-Pipeline erforderlich ist.
Bei sensiblen Dateien ist die lokale Verarbeitung besonders wichtig. Private Bilder können Gesichter, Orte, Dokumente, Produktprototypen, interne Screenshots oder Metadaten enthalten. Selbst wenn ein Cloud-Dienst legitim ist, unterscheidet sich das Datenschutzmodell von einem browserlokalen Workflow. Am sichersten ist es, das Hochladen von Originalen zu vermeiden, es sei denn, das Hochladen ist notwendig und Sie vertrauen den Servicebedingungen.
Was ist Resizo vs. iLoveIMG: Datenschutz, Geschwindigkeit, Einschränkungen und beste Anwendungsfälle?
Bei Resizo vs. iLoveIMG: Datenschutz, Geschwindigkeit, Grenzen und beste Anwendungsfälle handelt es sich um den Prozess, ein Originalbild in eine sicherere, kleinere und besser angepasste Ausgabe für ein bestimmtes Ziel umzuwandeln. Das Ziel könnte ein Website-Hero, eine E-Commerce-Produktgalerie, ein Bewerbungsformular, ein E-Mail-Anhang, ein soziales Profil, ein Dokumentations-Screenshot oder eine interne Kundenbewertung sein.
Praktisch gesehen umfasst der Workflow vier Entscheidungen: Dimensionen, Format, Qualität und Datenschutz. Die Abmessungen entscheiden darüber, wie viele Pixel das endgültige Bild enthält. Das Format entscheidet, ob die Datei JPEG, PNG, WebP oder ein anderer Typ sein soll. Qualität steuert den Kompromiss zwischen Komprimierung und visuellen Details. Der Datenschutz entscheidet darüber, ob das Originalbild auf dem Gerät verbleiben oder auf einen Cloud-Prozessor hochgeladen werden soll.
Moderne Browser unterstützen den Bildexport über Web-APIs. MDN-Dokumente, deren Canvas-Export Bild-Blobs erstellen kann und dass Formate wie PNG erforderlich sind, während JPEG und WebP von vielen Browsern weitgehend unterstützt werden. Aus diesem Grund können Browser-First-Tools viele alltägliche Bildaufgaben ohne Server-Roundtrip bewältigen.
Warum es wichtig ist
Bildfehler sind teuer, weil sie leicht zu übersehen sind. Ein Websitebesitzer lädt möglicherweise ein 5 MB großes Telefonfoto hoch und fragt sich, warum die Seite langsam erscheint. Ein Schüler kann ein Ausweisbild komprimieren, bis der Text unleserlich wird. Ein Verkäufer lädt möglicherweise Produktfotos mit nicht übereinstimmenden Ausschnitten hoch und lässt den gesamten Katalog dadurch weniger vertrauenswürdig erscheinen. Ein Freiberufler sendet Kundenbilder möglicherweise über ein zufälliges Tool, da dies das erste Suchergebnis war.
Wählen Sie Resizo, wenn Datenschutz, kein Upload, schnelle Größenänderung und direkte Formatsteuerung wichtiger sind als eine große Cloud-Suite mit mehreren Tools. Das ist der Hauptgrund dafür, einen fokussierten Workflow anstelle von Vermutungen zu verwenden. Das Ziel besteht nicht darin, der kleinstmöglichen Zahl nachzujagen. Das Ziel besteht darin, eine Datei zu erstellen, die klein genug, klar genug, in der richtigen Größe und für den Datenschutzgrad des Inhalts geeignet ist.
Google Search Central empfiehlt außerdem die Verwendung von Standard-HTML-Bildelementen, nützlichem Alternativtext, unterstützten Formaten, strukturierten Daten und Bildseiten, die auf Geschwindigkeit und Qualität optimiert sind. Mit anderen Worten: Bildoptimierung ist nicht nur eine Designaufgabe. Es wirkt sich auf die Zugänglichkeit, die Sichtbarkeit in der Suche, das Vertrauen der Benutzer und die Konvertierung aus.
Hauptvorteile
- Sie reduzieren die verschwendete Upload-Zeit, da der datenschutzorientierte Größenvergleich der Bilder erfolgt, bevor die Datei eine Website, ein Formular oder ein CMS erreicht.
- Sie machen die Ausgabe vorhersehbar: genaue Abmessungen, sinnvolle Dateigröße und ein Format, das zum Ziel passt.
- Sie schützen das Originalbild, indem Sie eine separate optimierte Kopie exportieren, anstatt die einzige Version zu bearbeiten, die Sie haben.
- Sie vermeiden häufige Qualitätsschäden wie gestreckte Seitenverhältnisse, wiederholte Komprimierung und unnötiges Hochskalieren.
- Sie erstellen Bilder, die für Benutzer einfacher herunterzuladen und für Suchmaschinen leichter zu verstehen sind, wenn sie mit guten Dateinamen und Alternativtext kombiniert werden.
Für Entwickler, E-Commerce-Verkäufer, Vermarkter, Webdesigner, Studenten und kleine Teams liegt der größte Vorteil normalerweise in der Kontrolle. Sie entscheiden, was das Gerät verlässt, was in der Größe geändert wird, welches Format exportiert wird und welche Qualitätsstufe akzeptabel ist. Diese Kontrolle ist schwer zu erreichen, wenn jede kleine Bildaufgabe mit einem obligatorischen Upload und einem Black-Box-Export beginnt.
Schritt-für-Schritt-Anleitung
- Entscheiden Sie, was am wichtigsten ist: Datenschutz, Komprimierungsverhältnis, genaue Abmessungen, Losgröße oder Werkzeugvielfalt.
- Testen Sie dasselbe Originalbild in Resizo Image Resizer und iLoveIMG, damit Sie die tatsächliche Ausgabe anstelle von Behauptungen vergleichen können.
- Überprüfen Sie die endgültigen Pixelabmessungen, das Dateiformat und die Dateigröße. Eine kleinere Datei ist nicht automatisch besser, wenn sie verschwommen oder falsch zugeschnitten ist.
- Öffnen Sie die Ausgabe mit 100-prozentigem Zoom und prüfen Sie Flächen, Text, Produktkanten, transparente Bereiche und Farbverläufe.
- Bevorzugen Sie für private oder Kundendateien den lokalen Resizo-Workflow, damit die Originale während der Größenänderung und Komprimierung auf dem Gerät bleiben.
- Vergleichen Sie für öffentliche Assets, bei denen eine maximale automatisierte Komprimierung wichtig ist, die Ausgabe von iLoveIMG mit einem Resizo-WebP- oder JPEG-Export.
- Bewahren Sie die Originaldateien in einem separaten Ordner auf und exportieren Sie eine eindeutig benannte, webfähige Kopie.
Empfohlene Einstellungen
| Anwendungsfall | Empfohlenes Format/Tool | Größenziel | Best Practice |
|---|---|---|---|
| Privat- oder Kundenbilder | Lokaler Resizo-Workflow | Exakte Ausgabemaße | Am besten, wenn Dateien auf dem Gerät bleiben sollen |
| Nur einfache Komprimierung | iLoveIMG | Originalmaße | Nützlich, wenn die Upload-basierte Komprimierung akzeptabel ist |
| Größe ändern und komprimieren | Helfen | Stellen Sie Breite und Qualität gemeinsam ein | Vermeidet separate Tools und wiederholte Exporte |
| Große Wiederholungsoperationen | Testen Sie beide Tools | Leistung und Zeit messen | Wählen Sie basierend auf Datenschutz, Geschwindigkeit und Einschränkungen aus |
Diese Einstellungen sind Ausgangspunkte, keine Gesetze. Ein Porträt, ein Screenshot, ein transparentes Logo und ein Marktplatz-Produktfoto verhalten sich alle unterschiedlich. Testen Sie immer einige repräsentative Dateien, bevor Sie einen großen Ordner verarbeiten.
Best Practices
- Beginnen Sie mit dem hochwertigsten Original, das Sie haben. Die Größenänderung einer fehlerhaften Kopie verstärkt in der Regel Unschärfe und Komprimierungsblockaden.
- Legen Sie die Dimensionen vor die Qualität fest. Die Pixelanzahl ist normalerweise der größte Faktor für die Dateigröße.
- Verwenden Sie einen Exportdurchlauf. Das erneute Öffnen und erneute Komprimieren derselben Ausgabe führt zu sichtbaren Schäden.
- Halten Sie einen kleinen Testsatz mit verschiedenen Bildtypen bereit: Porträt, Produkt, Screenshot, dunkles Foto und transparente Grafik.
- Verwenden Sie beschreibende Namen wie resized-passport-photo.jpg oder product-main-1200.webp anstelle von IMG_4829-final-final.jpg.
- Bewahren Sie die exportierte Datei in der Nähe der relevanten Kopie auf der Seite auf und verwenden Sie einen natürlichen Alternativtext. Befolgen Sie dabei die Google-Bilder-SEO-Anleitungen.
Eine Expertengewohnheit macht einen großen Unterschied: Benennen Sie die Ergebnisse nach Zweck und nicht nach Stimmung. Eine Datei namens homepage-hero-1600.webp sagt einem zukünftigen Redakteur genau, was es ist. Eine Datei namens final-new-2.jpg sagt ihnen nichts und führt in der Regel zu Doppelarbeit.
Häufige Fehler
- Hochladen vertraulicher Fotos in ein Tool, bevor überprüft wird, wie der Dienst Dateien verarbeitet und speichert.
- Erzwingen einer festen Breite und Höhe, die Personen, Produkte, Logos oder Dokumente verzerrt.
- Skalieren Sie ein kleines Quellbild hoch und erwarten Sie, dass echte Details angezeigt werden. Durch die Hochskalierung können Pixel vergrößert, fehlende Informationen jedoch nicht wiederhergestellt werden.
- Für jedes Foto wird PNG verwendet. PNG eignet sich hervorragend für Transparenz und scharfe Grafiken, allerdings werden Fotos oft unnötig groß.
- Ignorieren des letzten Anwendungsfalls. Ein Master in Druckqualität und eine schnelle Webvorschau sind unterschiedliche Dateien mit unterschiedlichen Anforderungen.
- Originale werden zu früh gelöscht. Bewahren Sie die Quelldateien immer auf, bis der optimierte Satz live ist und überprüft wird.
Der häufigste Fehler besteht darin, für die falsche Metrik zu optimieren. Die kleinste Datei ist nicht immer die beste Datei. Die beste Datei ist diejenige, die schnell geladen wird, genau die Größe hat, die Benutzer sehen, die Zielanforderung erfüllt und nicht mehr private Informationen offenlegt als nötig.
Erweiterte Tipps
- Erstellen Sie zwei Exporte für wichtige Web-Assets: einen 1600-Pixel-Master für große Bildschirme und eine kleinere 800-Pixel-Version für Miniaturansichten oder Karten.
- Machen Sie beim E-Commerce vor der Komprimierung einen konsistenten Zuschnitt und Hintergrund zu einem Teil des Prozesses. Die visuelle Konsistenz ist oft genauso wichtig wie die Dateigröße.
- Testen Sie für Screenshots PNG und WebP. Textlastige Screenshots können schlechter aussehen, wenn sie wie normale Fotos komprimiert werden.
- Ändern Sie bei Formularen mit strengen KB-Grenzwerten zuerst die Größe und verringern Sie dann die Qualität schrittweise in kleinen Schritten.
- Laden Sie bei privaten Arbeitsabläufen das Tool, trennen Sie die Verbindung zum Internet und schließen Sie die lokale Verarbeitung ab, nachdem die Seite geöffnet ist.
- Dokumentieren Sie Ihre bevorzugten Einstellungen, damit Teammitglieder jedes Mal auf die gleiche Weise exportieren.
Wenn Sie einen wiederkehrenden Arbeitsablauf verwalten, erstellen Sie ein kleines internes Voreinstellungsblatt. Geben Sie die Zielbreite, das Ausgabeformat, den Qualitätsbereich, das Benennungsmuster und die Überprüfungscheckliste an. Dieses Blatt spart mehr Zeit, als jedes Mal, wenn eine neue Charge eintrifft, die Einstellungen zu erraten.
Echte Beispiele und Anwendungsfälle
| Szenario | Problem | Empfohlener Resizo-Workflow |
|---|---|---|
| Kleinunternehmen | Produktfotos müssen vor dem Hochladen zugeschnitten, in der Größe geändert und einheitlich benannt werden. | Verwenden Sie Resizo für die lokale Größenänderung und Benennung. Vergleichen Sie iLoveIMG, wenn Sie das umfassendere Cloud-Toolkit benötigen. |
| Lehrerin | Studentenfotos und gescannte Formulare müssen für E-Mails verkleinert werden. | Verwenden Sie die lokale Resizo-Verarbeitung, da die Dateien vertraulich sind. |
| Designerin | Öffentliche Marketingbilder erfordern mehrere schnelle Bearbeitungen. | Beide Tools können funktionieren. Wählen Sie basierend auf dem Datenschutz und der Frage, ob die Upload-basierte Verarbeitung akzeptabel ist. |
Vorher-Nachher-Beispiele
| Vor | Aktion | Typisches Ergebnis | Warum es funktioniert |
|---|---|---|---|
| Telefonfoto, 4032 x 3024, 4,8 MB | Ändern Sie die Größe auf eine Breite von 1600 Pixel und exportieren Sie WebP/JPEG mit einer Qualität von 80 | Oft 250-700 KB | Am besten für Blogs, Portfolios und einfache Web-Uploads geeignet |
| PNG-Screenshot, 2880 Pixel breit, 2,4 MB | Passen Sie die Größe an die Anzeigegröße an und testen Sie PNG vs. WebP | Oft 300-900 KB | Hält den UI-Text lesbar und entfernt gleichzeitig übergroße Pixel |
| Produktbild-Set, gemischte Maße | Ändern Sie die Größe im Stapel auf eine konsistente Leinwand und benennen Sie Dateien um | Konsistente Galerie-Assets | Verbessert UX und vermeidet Layoutsprünge |
| Privates Profilfoto | Quadrat zuschneiden, Größe an Plattformgröße anpassen, lokal exportieren | Kleines, sauberes Profilbild | Vermeidet das Hochladen des Originalfotos mit hoher Auflösung |
Vorher-Nachher-Beispiele sollten als realistische Bereiche und nicht als Garantien betrachtet werden. Die Einsparungen bei der Komprimierung hängen vom Originalbild, dem Rauschen, den Abmessungen, dem Format und davon ab, wie viele visuelle Details erhalten bleiben müssen. Der Arbeitsablauf ist weiterhin zuverlässig: Zuerst die Größe unnötiger Pixel ändern, das Format für den Inhalt auswählen und dann die Qualität nur soweit anpassen, wie es der Anwendungsfall zulässt.
Praktischer Arbeitsablauf mit Resizo Image Resizer
Offen Resizo Image Resizer, fügen Sie eine repräsentative Datei hinzu und führen Sie einen kleinen Test durch. Sehen Sie sich die Vorschau an. Wenn die Ausgabe korrekt aussieht, wiederholen Sie dieselben Einstellungen für den gesamten Stapel. Führen Sie dies bei vertraulichen Dateien aus, bevor Sie Bilder per E-Mail, Formulare, CMS-Uploads oder Kundenportale senden. Kombinieren Sie für öffentliche Web-Assets den Export mit beschreibenden Dateinamen, nützlichem Alternativtext und Bildabmessungen im HTML, um Layoutverschiebungen zu reduzieren.
Wenn es auf die Qualität ankommt, vergleichen Sie in zwei Zoomstufen. Sehen Sie sich das Bild zunächst in der tatsächlichen Größe an, in der es für Benutzer sichtbar ist. Überprüfen Sie dann bei 100-Prozent-Zoom den Text, die Flächen, die Produktkanten und die Transparenz. Wenn beide Prüfungen bestanden werden, ist die Datei normalerweise fertig.
Externe Autoritätsquellen, die einen Blick wert sind
| Quelle | Warum es nützlich ist | URL |
|---|---|---|
| MDN HTMLCanvasElement.toBlob | Erklärt, wie der Browser-Canvas Bild-Blobs, Formate und Qualitätseinstellungen exportiert. | https://developer.mozilla.org/en-US/docs/Web/API/HTMLCanvasElement/toBlob |
| web.dev Lernen Sie Bilder | Eine praktische Referenz für Web-Bildformate, responsive Bilder und Leistung. | https://web.dev/learn/images |
| Best Practices für Google Image SEO | Google-Anleitung für erkennbare Bilder, Alternativtext, strukturierte Daten und schnelle Bildseiten. | https://developers.google.com/search/docs/appearance/google-images |
| iLoveIMG-Preise | Listet kostenlose und kostenpflichtige Pläne, Aufgabenlimits, Dateigrößenbeschränkungen und sicherheitsrelevante Plandetails auf. | https://www.iloveimg.com/pricing |
| iLoveIMG-Datenschutzseite | Verlinkt auf iLoveIMG-Datenschutzinformationen und beschreibt seine Transparenzverpflichtungen. | https://www.iloveimg.com/help/privacy |
Häufig gestellte Fragen
Ist Resizo besser als iLoveIMG?
Resizo eignet sich besser für lokale Größenänderungen ohne Upload und schnelle private Arbeitsabläufe. iLoveIMG ist eine umfassendere Cloud-Image-Suite. Die richtige Wahl hängt davon ab, ob Datenschutz, Dateibeschränkungen oder Werkzeugvielfalt wichtiger sind.
Kann ich das mit Resizo Image Resizer machen?
Ja. Resizo Image Resizer ist genau für diesen Arbeitsablauf konzipiert. Sie können Abmessungen, Format und Qualitätseinstellungen auswählen und dann eine optimierte Kopie herunterladen, ohne das Original zu ändern.
Lädt Resizo meine Bilder hoch?
Bei unterstützten Resizo-Browsertools wird das Bild lokal in Ihrem Browser verarbeitet. Das bedeutet, dass die Originaldatei während der Größenänderung, Komprimierung, Konvertierung und Vorschau auf Ihrem Gerät verbleibt.
Welches Format soll ich wählen?
Verwenden Sie WebP für die meisten modernen Webseiten, JPEG für umfassende Fotokompatibilität und PNG, wenn Sie Transparenz, scharfe UI-Grafiken oder genaue Screenshot-Details benötigen.
Reduziert die Reduzierung der Dateigröße immer die Qualität?
Nicht immer sichtbar. Wenn Sie zunächst unnötige Pixel reduzieren und vernünftige Qualitätseinstellungen verwenden, kann die Datei bei normaler Anzeigegröße deutlich kleiner werden, während sie gleich aussieht.
Welche Qualitätseinstellung ist die beste?
Beginnen Sie für Fotos bei etwa 75–85 und prüfen Sie das Ergebnis. Testen Sie für Screenshots oder Grafiken PNG und WebP, da normale Fotokomprimierung dazu führen kann, dass Text und Kanten rau aussehen.
Was sind die kostenlosen iLoveIMG-Limits?
iLoveIMG listet beim Basisplan eine eingeschränkte Verarbeitung und bei den kostenpflichtigen Plänen höhere Verarbeitungs-/Dateigrößenbeschränkungen auf. Überprüfen Sie immer die aktuelle offizielle Preisseite, bevor Sie sich auf ein Limit verlassen.
Soll ich das Original nach dem Export löschen?
Nein. Bewahren Sie das Original auf, bis das endgültige Bild hochgeladen, überprüft und genehmigt wurde. Speichern Sie optimierte Exporte in einem separaten Ordner, damit Sie sie später neu generieren können.
Wie vermeide ich eine verschwommene Ausgabe?
Skalieren Sie kleine Dateien nicht hoch, behalten Sie das Seitenverhältnis bei, exportieren Sie vom Original und überprüfen Sie das Ergebnis bei 100-prozentigem Zoom, bevor Sie es in der Produktion verwenden.
Ist das gut für SEO?
Ja, in Kombination mit schnellen Dateigrößen, beschreibenden Dateinamen, nützlichem Alternativtext, geeigneten HTML-Bildelementen und relevantem Seiteninhalt in der Nähe des Bildes.
Abschluss
Bei Resizo vs. iLoveIMG: Privacy, Speed, Limits, and Best Use Cases geht es nicht darum, einer magischen Komprimierungszahl nachzujagen. Es geht darum, die sicherste und nützlichste Ausgabe für den Job auszuwählen. Beginnen Sie mit dem Ziel, ändern Sie die Pixelgröße, bevor Sie die Qualität verringern, wählen Sie das richtige Format und schützen Sie private Originale. Resizo Image Resizer bietet Ihnen einen schnellen lokalen Workflow, ohne eine einfache Bildaufgabe in einen Upload-intensiven Prozess zu verwandeln.
Verwenden Sie Resizo, wenn Sie praktische Kontrolle wünschen: Abmessungen, Format, Qualität, Datenschutz und Stapelgeschwindigkeit. Verwenden Sie Konkurrenz- oder Cloud-Tools nur dann, wenn deren spezifische Funktionen den Upload- und Konto-Workflow für Ihren Anwendungsfall wert sind.
Lösen Sie es mit Resizo Image Resizer
Wählen Sie Resizo, wenn Datenschutz, kein Upload, schnelle Größenänderung und direkte Formatsteuerung wichtiger sind als eine große Cloud-Suite mit mehreren Tools
Probieren Sie Resizo kostenlos aus