Si estas buscando Resizo y iLoveIMG, probablemente no necesite otra lista vaga de herramientas. Necesita un flujo de trabajo práctico que resuelva un problema real: los usuarios quieren saber si un amplio conjunto de imágenes basado en servidor o una herramienta basada en el navegador local es mejor para su flujo de trabajo. Esta guía explica cómo tomar la decisión correcta sobre la imagen, cómo utilizar Resizo Image Resizer y cómo evitar los errores que arruinan silenciosamente la calidad, la privacidad o la velocidad de la página.
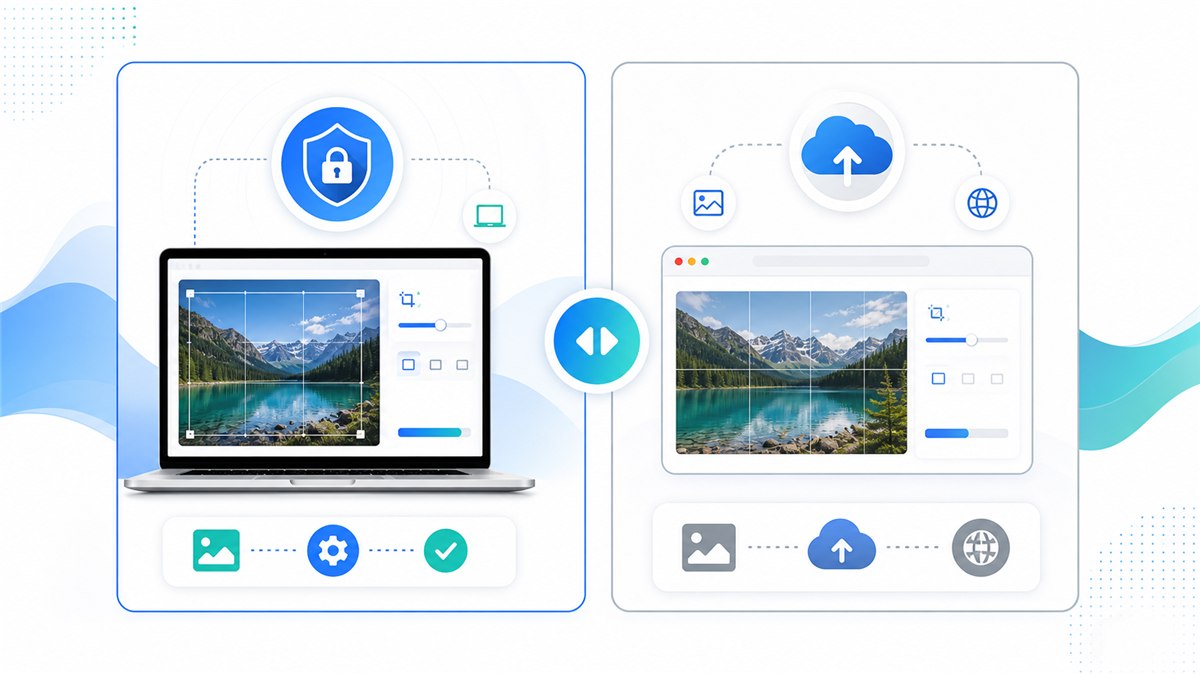
Tabla comparativa de iLoveIMG y Resizo
| Punto de decisión | Ayuda | iLoveIMG |
|---|---|---|
| modelo de procesamiento | Procesamiento local primero en el navegador para flujos de trabajo compatibles | Procesamiento en la nube/servidor para la mayoría de las herramientas |
| Mejor ajuste | Cambio de tamaño privado, salida rápida, flujos de trabajo sin cuenta | Amplio conjunto de herramientas de imágenes con muchas funciones de nube |
| Límites libres | No hay límite estricto de carga del lado del servidor porque los archivos no se cargan | La página oficial de precios enumera el procesamiento limitado en los niveles Básico y superiores en los niveles pagos |
| Ángulo de privacidad | Los archivos originales permanecen en el dispositivo durante las tareas locales | Las cargas son manejadas por el servicio, así que lea sus términos de privacidad y procesamiento. |
| control de salida | Cambio de tamaño, calidad, formato y configuración de lotes en un solo flujo ligero | Sólido conjunto de herramientas de imágenes independientes con diferencias de capacidades basadas en planes |
Esta comparación no pretende convertir cada flujo de trabajo en una elección en la que el ganador se lo lleva todo. iLoveIMG puede resultar útil cuando su flujo de trabajo, automatización o conjunto de funciones en la nube se adaptan a sus necesidades. Resizo es el mejor valor predeterminado cuando la imagen original debe permanecer en su dispositivo, cuando necesita dimensiones exactas antes de la compresión o cuando desea un resultado rápido sin fricciones en la cuenta.
Introducción
Resizo vs iLoveIMG: la privacidad, la velocidad, los límites y los mejores casos de uso son importantes porque el trabajo con imágenes rara vez es solo una tarea estética. Una sola foto de gran tamaño puede ralentizar un sitio web, fallar la carga de un formulario, exponer contenido privado o crear galerías de productos inconsistentes. Una sola exportación demasiado comprimida puede hacer que las caras parezcan cerosas, el texto ilegible y los gráficos de la marca poco profesionales.
El mejor enfoque es simple: comience con el destino real, establezca primero las dimensiones en píxeles, elija un formato que se ajuste al contenido, exporte una vez e inspeccione el resultado antes de publicarlo o compartirlo. Resizo se basa en ese flujo de trabajo. Ejecuta operaciones de imágenes comunes en el navegador, lo que significa que las tareas de cambio de tamaño, compresión, conversión y vista previa admitidas pueden realizarse localmente en lugar de requerir una canalización de carga primero.
Para archivos confidenciales, el procesamiento local es especialmente importante. Las imágenes privadas pueden contener caras, ubicaciones, documentos, prototipos de productos, capturas de pantalla internas o metadatos. Incluso cuando un servicio en la nube es legítimo, el modelo de privacidad es diferente del flujo de trabajo local del navegador. El hábito más seguro es evitar cargar originales a menos que la carga sea necesaria y usted confíe en los términos del servicio.
¿Qué es Resizo vs iLoveIMG: privacidad, velocidad, límites y mejores casos de uso?
Resizo vs iLoveIMG: privacidad, velocidad, límites y mejores casos de uso es el proceso de convertir una imagen original en una salida más segura, más pequeña y mejor adaptada a un destino específico. El destino puede ser el héroe de un sitio web, una galería de productos de comercio electrónico, un formulario de solicitud de empleo, un archivo adjunto de correo electrónico, un perfil social, una captura de pantalla de documentación o una revisión interna de un cliente.
En términos prácticos, el flujo de trabajo incluye cuatro decisiones: dimensiones, formato, calidad y privacidad. Las dimensiones deciden cuántos píxeles contiene la imagen final. El formato decide si el archivo debe ser JPEG, PNG, WebP u otro tipo. La calidad controla el equilibrio entre compresión y detalle visual. La privacidad decide si la imagen original debe permanecer en el dispositivo o cargarse en un procesador en la nube.
Los navegadores modernos admiten la exportación de imágenes a través de API web. Los documentos MDN que se exportan en lienzo pueden crear blobs de imágenes y que se requieren formatos como PNG, mientras que JPEG y WebP son ampliamente compatibles con muchos navegadores. Es por eso que las herramientas basadas en el navegador pueden manejar muchas tareas cotidianas de imágenes sin un viaje de ida y vuelta al servidor.
Por qué es importante
Los errores de imagen son costosos porque es fácil pasarlos por alto. El propietario de un sitio web puede cargar una foto de teléfono de 5 MB y preguntarse por qué la página parece lenta. Un estudiante puede comprimir una imagen de identificación hasta que el texto se vuelva ilegible. Un vendedor puede subir fotografías de productos con cultivos que no coinciden y hacer que todo el catálogo parezca menos confiable. Un profesional independiente puede enviar imágenes de clientes a través de una herramienta aleatoria porque fue el primer resultado de búsqueda.
elija Resizo cuando la privacidad, la ausencia de carga, el cambio de tamaño rápido y el control directo del formato sean más importantes que un gran conjunto de herramientas en la nube de múltiples herramientas. Ésa es la razón principal para utilizar un flujo de trabajo centrado en lugar de adivinar. El objetivo no es perseguir el menor número posible. El objetivo es crear un archivo que sea lo suficientemente pequeño, claro, del tamaño correcto y apropiado para el nivel de privacidad del contenido.
Google Search Central también recomienda utilizar elementos de imagen HTML estándar, texto alternativo útil, formatos compatibles, datos estructurados y páginas de imágenes optimizadas en cuanto a velocidad y calidad. En otras palabras, la optimización de imágenes no es sólo una tarea de diseño. Afecta la accesibilidad, la visibilidad de búsqueda, la confianza del usuario y la conversión.
Beneficios clave
- Reduce el tiempo de carga perdido porque la comparación de cambio de tamaño de imágenes centrada en la privacidad se realiza antes de que el archivo llegue a un sitio web, formulario o CMS.
- Usted hace que el resultado sea predecible: dimensiones exactas, tamaño de archivo razonable y un formato que se ajuste al destino.
- Protege la imagen original exportando una copia optimizada por separado en lugar de editar la única versión que tiene.
- Evita daños comunes en la calidad, como relaciones de aspecto estiradas, compresión repetida y aumento de escala innecesario.
- Crea imágenes que son más fáciles de descargar para los usuarios y más fáciles de entender para los motores de búsqueda cuando se combinan con buenos nombres de archivos y texto alternativo.
Para los creadores, vendedores de comercio electrónico, especialistas en marketing, diseñadores web, estudiantes y equipos pequeños, el mayor beneficio suele ser el control. Usted decide qué sale del dispositivo, qué se cambia de tamaño, qué formato se exporta y qué nivel de calidad es aceptable. Ese control es difícil de conseguir cuando cada pequeña tarea de imagen comienza con una carga obligatoria y una exportación de cuadro negro.
Guía paso a paso
- Decida qué es lo más importante: privacidad, relación de compresión, dimensiones exactas, tamaño de lote o variedad de herramientas.
- Pruebe la misma imagen original en Resizo Image Resizer e iLoveIMG para comparar resultados reales en lugar de afirmaciones.
- Verifique las dimensiones finales en píxeles, el formato y el tamaño del archivo. Un archivo más pequeño no es automáticamente mejor si está borroso o mal recortado.
- Abra la salida con un zoom del 100 por ciento e inspeccione caras, texto, bordes del producto, áreas transparentes y degradados de color.
- Para archivos privados o de clientes, prefiera el flujo de trabajo local de Resizo para que los originales permanezcan en el dispositivo durante el cambio de tamaño y la compresión.
- Para recursos públicos donde es importante la máxima compresión automatizada, compare la salida de iLoveIMG con una exportación Resizo WebP o JPEG.
- Guarde los archivos originales en una carpeta separada y exporte una copia lista para la web con un nombre claro.
Configuraciones recomendadas
| Caso de uso | Formato/herramienta recomendado | Objetivo de tamaño | Mejores prácticas |
|---|---|---|---|
| Imágenes privadas o de clientes | Flujo de trabajo local de Resizo | Dimensiones de salida exactas | Es mejor cuando los archivos deben permanecer en el dispositivo |
| Sólo compresión simple | iLoveIMG | Dimensiones originales | Útil cuando la compresión basada en carga es aceptable |
| Cambiar tamaño y comprimir | Ayuda | Establecer ancho y calidad juntos | Evita herramientas separadas y exportaciones repetidas |
| Grandes operaciones repetidas | Pruebe ambas herramientas | Medir la producción y el tiempo | Elija según la privacidad, la velocidad y los límites |
Estos escenarios son puntos de partida, no leyes. Un retrato, una captura de pantalla, un logotipo transparente y una foto de producto del mercado se comportan de manera diferente. Pruebe siempre algunos archivos representativos antes de procesar una carpeta grande.
Mejores prácticas
- Comience con el original de mayor calidad que tenga. Cambiar el tamaño de una copia defectuosa generalmente amplifica los bloques de desenfoque y compresión.
- Establezca las dimensiones antes que la calidad. El número de píxeles suele ser el mayor factor que influye en el tamaño del archivo.
- Utilice un pase de exportación. Reabrir y recomprimir la misma salida una y otra vez provoca daños visibles.
- Mantenga un pequeño conjunto de pruebas con diferentes tipos de imágenes: retrato, producto, captura de pantalla, fotografía oscura y gráfico transparente.
- Utilice nombres descriptivos como foto-pasaporte-redimensionada.jpg o producto-principal-1200.webp en lugar de IMG_4829-final-final.jpg.
- Mantenga el archivo exportado cerca de la copia relevante en la página y utilice un texto alternativo natural, siguiendo las instrucciones de SEO de imágenes de Google.
Un hábito experto marca una gran diferencia: nombrar el resultado según el propósito, no el estado de ánimo. un archivo llamado página de inicio-hero-1600.webp le dice a un futuro editor exactamente qué es. un archivo llamado final-nuevo-2.jpg no les dice nada y normalmente lleva a duplicar el trabajo.
Errores comunes
- Cargar fotografías confidenciales a una herramienta antes de verificar cómo el servicio procesa y almacena archivos.
- Forzar un ancho y alto fijos que distorsionan personas, productos, logotipos o documentos.
- Mejorar una imagen de origen pequeña y esperar que aparezcan detalles reales. La mejora de escala puede ampliar los píxeles, pero no puede recrear la información faltante.
- Usando PNG para cada foto. PNG es excelente para transparencia y gráficos nítidos, pero las fotos a menudo se vuelven innecesariamente grandes.
- Ignorando el caso de uso final. Un master con calidad de impresión y una vista previa web rápida son archivos diferentes con requisitos diferentes.
- Eliminando originales demasiado pronto. Conserve siempre los archivos fuente hasta que el conjunto optimizado esté activo y verificado.
El error más común es optimizar según la métrica incorrecta. El archivo más pequeño no siempre es el mejor archivo. El mejor archivo es aquel que se carga rápidamente, se ve exactamente en el tamaño que ven los usuarios, cumple con los requisitos de destino y no expone más información privada de la necesaria.
Consejos avanzados
- Cree dos exportaciones para recursos web importantes: un maestro de 1600 px para pantallas grandes y una versión más pequeña de 800 px para miniaturas o tarjetas.
- Para el comercio electrónico, haga que un recorte y un fondo consistentes formen parte del proceso antes de la compresión. La coherencia visual suele ser tan importante como el tamaño del archivo.
- Para capturas de pantalla, pruebe PNG y WebP. Las capturas de pantalla con mucho texto pueden verse peor si se comprimen como fotos normales.
- Para formularios con límites estrictos de KB, primero cambie el tamaño de las dimensiones y luego reduzca la calidad gradualmente en pequeños pasos.
- Para flujos de trabajo privados, cargue la herramienta, desconéctese de Internet y complete el procesamiento local después de abrir la página.
- Documente su configuración preferida para que los miembros del equipo exporten de la misma manera siempre.
Si administra un flujo de trabajo recurrente, cree una pequeña hoja interna preestablecida. Incluya el ancho objetivo, el formato de salida, el rango de calidad, el patrón de nomenclatura y la lista de verificación de revisión. Esa hoja ahorra más tiempo que adivinar la configuración cada vez que llega un nuevo lote.
Ejemplos reales y casos de uso
| Guión | Problema | Flujo de trabajo de Resizo recomendado |
|---|---|---|
| Pequeña empresa | Las fotos de productos deben recortarse, cambiarse de tamaño y nombrarse de forma coherente antes de subirse. | Utilice Resizo para cambiar el tamaño y nombrar localmente; compare iLoveIMG si necesita su conjunto de herramientas de nube más amplio. |
| Maestra | Las fotografías de los estudiantes y los formularios escaneados deben reducirse para enviarse por correo electrónico. | Utilice el procesamiento local de Resizo porque los archivos son confidenciales. |
| Diseñadora | Las imágenes de marketing público necesitan varias ediciones rápidas. | Cualquiera de las dos herramientas puede funcionar; elija según la privacidad y si el procesamiento basado en carga es aceptable. |
Ejemplos de antes y después
| Antes | Acción | Resultado típico | Por que funciona |
|---|---|---|---|
| Foto del teléfono, 4032 x 3024, 4,8 MB | Cambie el tamaño a 1600 px de ancho y exporte WebP/JPEG con calidad 80 | A menudo 250-700 KB | Lo mejor para blogs, portafolios y cargas web básicas |
| Captura de pantalla PNG, 2880 px de ancho, 2,4 MB | Cambie el tamaño para mostrar el tamaño y pruebe PNG vs WebP | A menudo 300-900 KB | Mantiene legible el texto de la interfaz de usuario mientras elimina los píxeles de gran tamaño |
| Conjunto de imágenes del producto, dimensiones mixtas | Cambiar el tamaño por lotes a un lienzo consistente y cambiar el nombre de los archivos | Activos de galería consistentes | Mejora la UX y evita saltos de diseño. |
| Foto de perfil privada | Recortar cuadrado, cambiar el tamaño al tamaño de la plataforma, exportar localmente | Imagen de perfil pequeña y limpia | Evita subir la foto original en alta resolución. |
Los ejemplos de antes y después deben tratarse como rangos realistas, no como garantías. Los ahorros en compresión dependen de la imagen original, el ruido, las dimensiones, el formato y la cantidad de detalles visuales que se deben conservar. El flujo de trabajo sigue siendo confiable: primero cambie el tamaño de los píxeles innecesarios, elija el formato para el contenido y luego ajuste la calidad solo en la medida que lo permita el caso de uso.
Flujo de trabajo práctico con Resizo Image Resizer
Abierta Resizo Cambio de tamaño de imagen, agregue un archivo representativo y ejecute una pequeña prueba. Consulta la vista previa. Si el resultado se ve bien, repita la misma configuración en el lote completo. Para archivos confidenciales, haga esto antes de enviar imágenes por correo electrónico, formularios, cargas de CMS o portales de clientes. Para recursos web públicos, combine la exportación con nombres de archivos descriptivos, texto alternativo útil y dimensiones de imagen en HTML para reducir los cambios de diseño.
Cuando la calidad importa, compare con dos niveles de zoom. Primero vea la imagen en el tamaño real que verán los usuarios. Luego, inspeccione con un zoom del 100 por ciento el texto, las caras, los bordes del producto y la transparencia. Si pasa ambas comprobaciones, el archivo suele estar listo.
Fuentes de autoridad externas que vale la pena consultar
| Fuente | Por que es util | URL |
|---|---|---|
| MDN HTMLCanvasElement.toBlob | Explica cómo el lienzo del navegador exporta blobs de imágenes, formatos y configuraciones de calidad. | https://developer.mozilla.org/en-US/docs/Web/API/HTMLCanvasElement/toBlob |
| web.dev Aprender imágenes | Una referencia práctica para formatos de imágenes web, imágenes responsivas y rendimiento. | https://web.dev/learn/images |
| Mejores prácticas de SEO de imágenes de Google | Guía de Google para imágenes detectables, texto alternativo, datos estructurados y páginas de imágenes rápidas. | https://developers.google.com/search/docs/appearance/google-images |
| Precios de iLoveIMG | Enumera planes gratuitos y de pago, límites de tareas, límites de tamaño de archivos y detalles del plan relacionados con la seguridad. | https://www.iloveimg.com/pricing |
| Página de privacidad de iLoveIMG | Enlaces a información de privacidad de iLoveIMG y describe sus compromisos de transparencia. | https://www.iloveimg.com/help/privacy |
Preguntas frecuentes
¿Es Resizo mejor que iLoveIMG?
Resizo es mejor para cambios de tamaño locales sin carga y flujos de trabajo privados rápidos. iLoveIMG es un conjunto de imágenes en la nube más amplio. La elección correcta depende de si son más importantes la privacidad, los límites de archivos o la variedad de herramientas.
¿Puedo hacer esto con Resizo Image Resizer?
Sí. Resizo Image Resizer está diseñado para este flujo de trabajo exacto. Puede elegir las dimensiones, el formato y la configuración de calidad y luego descargar una copia optimizada sin cambiar el original.
¿Resizo sube mis imágenes?
Para las herramientas de navegador Resizo compatibles, la imagen se procesa localmente en su navegador. Eso significa que el archivo original permanece en su dispositivo durante el cambio de tamaño, la compresión, la conversión y la vista previa.
¿Qué formato debo elegir?
Utilice WebP para la mayoría de las páginas web modernas, JPEG para una amplia compatibilidad de fotografías y PNG cuando necesite transparencia, gráficos de interfaz de usuario nítidos o detalles exactos de las capturas de pantalla.
¿Reducir el tamaño del archivo siempre reducirá la calidad?
No siempre de forma visible. Si primero reduce los píxeles innecesarios y utiliza configuraciones de calidad razonables, el archivo puede volverse mucho más pequeño y tener el mismo aspecto en tamaño de visualización normal.
¿Qué configuración de calidad es mejor?
Para fotografías, comience alrededor de 75-85 e inspeccione el resultado. Para capturas de pantalla o gráficos, pruebe PNG y WebP porque la compresión normal de fotografías puede hacer que el texto y los bordes parezcan ásperos.
¿Cuáles son los límites gratuitos de iLoveIMG?
iLoveIMG enumera el procesamiento limitado en su plan Básico y límites más altos de procesamiento/tamaño de archivo en los planes pagos. Consulte siempre la página de precios oficial actual antes de confiar en un límite.
¿Debo eliminar el original después de exportarlo?
No. Conserve el original hasta que la imagen final haya sido cargada, revisada y aprobada. Almacene las exportaciones optimizadas en una carpeta separada para poder regenerarlas más tarde.
¿Cómo evito una salida borrosa?
No escale archivos pequeños, mantenga la relación de aspecto bloqueada, exporte desde el original y verifique el resultado con un zoom del 100 por ciento antes de usarlo en producción.
¿Es esto bueno para SEO?
Sí, cuando se combina con tamaños de archivos rápidos, nombres de archivos descriptivos, texto alternativo útil, elementos de imagen HTML adecuados y contenido de página relevante cerca de la imagen.
Conclusión
Resizo vs iLoveIMG: privacidad, velocidad, límites y mejores casos de uso no se trata de perseguir un número mágico de compresión. Se trata de elegir el resultado más seguro y útil para el trabajo. Comience con el destino, cambie el tamaño de los píxeles antes de reducir la calidad, elija el formato correcto y proteja los originales privados. Resizo Image Resizer le brinda un flujo de trabajo local rápido para hacerlo sin convertir una tarea de imagen simple en un proceso de carga pesada.
Utilice Resizo cuando desee un control práctico: dimensiones, formato, calidad, privacidad y velocidad del lote. Utilice herramientas de la competencia o de la nube solo cuando sus características específicas merezcan la carga y el flujo de trabajo de la cuenta para su caso de uso.
Resuélvelo con Resizo Image Resizer
elija Resizo cuando la privacidad, la ausencia de carga, el cambio rápido de tamaño y el control directo del formato son más importantes que un gran conjunto de herramientas en la nube de gran tamaño
Prueba Resizo gratis