If you are searching for Resizo vs iLoveIMG, you probably do not need another vague tool list. You need a practical workflow that solves one real problem: users want to know whether a broad server-based image suite or a local browser-first tool is better for their workflow. This guide explains how to make the right image decision, how to use Resizo Image Resizer, and how to avoid the mistakes that quietly ruin quality, privacy, or page speed.
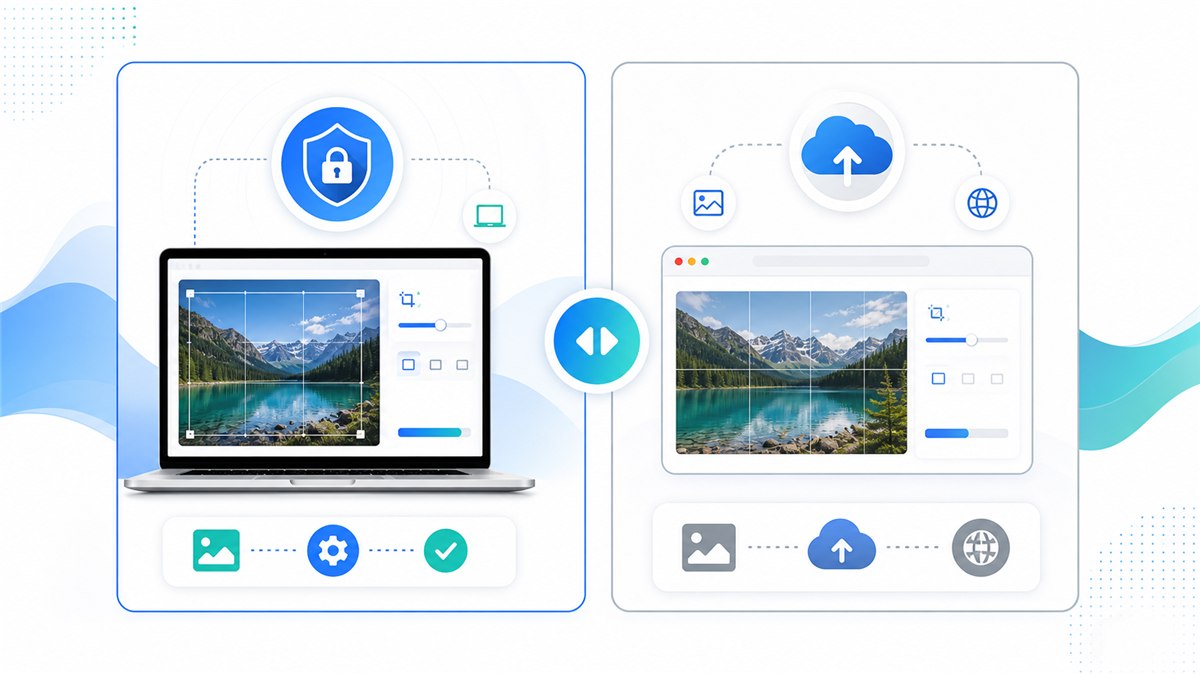
iLoveIMG vs Resizo Comparison Table
| Decision point | Resizo | iLoveIMG |
|---|---|---|
| Processing model | Browser-first local processing for supported workflows | Cloud/server processing for most tools |
| Best fit | Private resizing, quick output, no-account workflows | Broad image toolkit with many cloud features |
| Free limits | No hard server-side upload cap because files are not uploaded | Official pricing page lists limited processing on Basic and higher limits on paid tiers |
| Privacy angle | Original files stay on the device during local tasks | Uploads are handled by the service, so read their privacy and processing terms |
| Output control | Resize, quality, format, and batch settings in one lightweight flow | Strong set of separate image tools with plan-based capability differences |
This comparison is not meant to turn every workflow into a winner-takes-all choice. iLoveIMG can be useful when its cloud workflow, automation, or feature set matches your needs. Resizo is the better default when the original image should stay on your device, when you need exact dimensions before compression, or when you want a quick result without account friction.
Introduction
Resizo vs iLoveIMG: Privacy, Speed, Limits, and Best Use Cases matters because image work is rarely just an aesthetic task. A single oversized photo can slow a website, fail a form upload, expose private content, or create inconsistent product galleries. A single over-compressed export can make faces look waxy, text unreadable, and brand graphics unprofessional.
The better approach is simple: start with the real destination, set the pixel dimensions first, choose a format that fits the content, export once, and inspect the result before publishing or sharing. Resizo is built around that workflow. It runs common image operations in the browser, which means supported resize, compression, conversion, and preview tasks can happen locally instead of requiring an upload-first pipeline.
For sensitive files, local processing is especially important. Private images can contain faces, locations, documents, product prototypes, internal screenshots, or metadata. Even when a cloud service is legitimate, the privacy model is different from a browser-local workflow. The safest habit is to avoid uploading originals unless the upload is necessary and you trust the service terms.
What Is Resizo vs iLoveIMG: Privacy, Speed, Limits, and Best Use Cases?
Resizo vs iLoveIMG: Privacy, Speed, Limits, and Best Use Cases is the process of turning an original image into a safer, smaller, better-fitted output for a specific destination. The destination might be a website hero, ecommerce product gallery, job application form, email attachment, social profile, documentation screenshot, or internal client review.
In practical terms, the workflow includes four decisions: dimensions, format, quality, and privacy. Dimensions decide how many pixels the final image contains. Format decides whether the file should be JPEG, PNG, WebP, or another type. Quality controls the tradeoff between compression and visual detail. Privacy decides whether the original image should stay on the device or be uploaded to a cloud processor.
Modern browsers support image export through web APIs. MDN documents that canvas export can create image blobs and that formats such as PNG are required while JPEG and WebP are widely supported by many browsers. That is why browser-first tools can handle many everyday image tasks without a server round trip.
Why It Matters
Image mistakes are expensive because they are easy to miss. A website owner may upload a 5 MB phone photo and wonder why the page feels slow. A student may compress an ID image until the text becomes unreadable. A seller may upload product photos with mismatched crops and make the whole catalog feel less trustworthy. A freelancer may send client images through a random tool because it was the first search result.
choose Resizo when privacy, no upload, quick resizing, and direct format control matter more than a large multi-tool cloud suite. That is the core reason to use a focused workflow instead of guessing. The goal is not to chase the smallest possible number. The goal is to create a file that is small enough, clear enough, correctly sized, and appropriate for the privacy level of the content.
Google Search Central also recommends using standard HTML image elements, useful alt text, supported formats, structured data, and image pages that are optimized for speed and quality. In other words, image optimization is not only a design chore. It affects accessibility, search visibility, user trust, and conversion.
Key Benefits
- You reduce wasted upload time because privacy-focused image resizing comparison happens before the file reaches a website, form, or CMS.
- You make the output predictable: exact dimensions, sensible file size, and a format that fits the destination.
- You protect the original image by exporting a separate optimized copy instead of editing the only version you have.
- You avoid common quality damage such as stretched aspect ratios, repeated compression, and unnecessary upscaling.
- You create images that are easier for users to download and easier for search engines to understand when combined with good filenames and alt text.
For creators, ecommerce sellers, marketers, web designers, students, and small teams, the biggest benefit is usually control. You decide what leaves the device, what gets resized, what format is exported, and what quality level is acceptable. That control is hard to get when every small image task starts with a mandatory upload and a black-box export.
Step-by-Step Guide
- Decide what matters most: privacy, compression ratio, exact dimensions, batch size, or tool variety.
- Test the same original image in Resizo Image Resizer and iLoveIMG so you compare real output instead of claims.
- Check the final pixel dimensions, file format, and file size. A smaller file is not automatically better if it is blurry or cropped wrong.
- Open the output at 100 percent zoom and inspect faces, text, product edges, transparent areas, and color gradients.
- For private or client files, prefer the Resizo local workflow so originals stay on the device during resizing and compression.
- For public assets where maximum automated compression matters, compare iLoveIMG's output against a Resizo WebP or JPEG export.
- Keep the original files in a separate folder and export a clearly named web-ready copy.
Recommended Settings
| Use case | Recommended format/tool | Size target | Best practice |
|---|---|---|---|
| Private or client images | Resizo local workflow | Exact output dimensions | Best when files should stay on device |
| Simple compression only | iLoveIMG | Original dimensions | Useful when upload-based compression is acceptable |
| Resize plus compress | Resizo | Set width and quality together | Avoids separate tools and repeat exports |
| Large repeat operations | Test both tools | Measure output and time | Pick based on privacy, speed, and limits |
These settings are starting points, not laws. A portrait, screenshot, transparent logo, and marketplace product photo all behave differently. Always test a few representative files before processing a large folder.
Best Practices
- Start from the highest-quality original you have. Resizing a bad copy usually amplifies blur and compression blocks.
- Set dimensions before quality. Pixel count is usually the biggest driver of file size.
- Use one export pass. Reopening and recompressing the same output again and again causes visible damage.
- Keep a small test set with different image types: portrait, product, screenshot, dark photo, and transparent graphic.
- Use descriptive names such as resized-passport-photo.jpg or product-main-1200.webp instead of IMG_4829-final-final.jpg.
- Keep the exported file near relevant copy on the page and use a natural alt text, following Google image SEO guidance.
One expert habit makes a large difference: name the output based on purpose, not mood. A file called homepage-hero-1600.webp tells a future editor exactly what it is. A file called final-new-2.jpg tells them nothing and usually leads to duplicate work.
Common Mistakes
- Uploading sensitive photos to a tool before checking how the service processes and stores files.
- Forcing a fixed width and height that distorts people, products, logos, or documents.
- Upscaling a small source image and expecting true detail to appear. Upscaling can enlarge pixels, but it cannot recreate missing information.
- Using PNG for every photo. PNG is excellent for transparency and sharp graphics, but photos often become unnecessarily large.
- Ignoring the final use case. A print-quality master and a fast web preview are different files with different requirements.
- Deleting originals too soon. Always keep the source files until the optimized set is live and verified.
The most common mistake is optimizing for the wrong metric. The smallest file is not always the best file. The best file is the one that loads quickly, looks right at the size users see it, passes the destination requirement, and does not expose more private information than necessary.
Advanced Tips
- Create two exports for important web assets: a 1600 px master for large screens and a smaller 800 px version for thumbnails or cards.
- For ecommerce, make a consistent crop and background part of the process before compression. Visual consistency often matters as much as file size.
- For screenshots, test PNG and WebP. Text-heavy screenshots can look worse if compressed like ordinary photos.
- For forms with strict KB limits, resize dimensions first, then lower quality gradually in small steps.
- For private workflows, load the tool, disconnect from the internet, and complete local processing after the page is open.
- Document your preferred settings so team members export the same way every time.
If you manage a recurring workflow, create a small internal preset sheet. Include the target width, output format, quality range, naming pattern, and review checklist. That sheet saves more time than guessing settings every time a new batch arrives.
Real Examples and Use Cases
| Scenario | Problem | Recommended Resizo workflow |
|---|---|---|
| Small business | Product photos need crop, resize, and consistent naming before upload. | Use Resizo for local resizing and naming; compare iLoveIMG if you need its broader cloud toolkit. |
| Teacher | Student photos and scanned forms need to be reduced for email. | Use Resizo local processing because the files are sensitive. |
| Designer | Public marketing images need several quick edits. | Either tool can work; choose based on privacy and whether upload-based processing is acceptable. |
Before-and-after examples
| Before | Action | Typical result | Why it works |
|---|---|---|---|
| Phone photo, 4032 x 3024, 4.8 MB | Resize to 1600 px wide and export WebP/JPEG at 80 quality | Often 250-700 KB | Best for blogs, portfolios, and basic web uploads |
| PNG screenshot, 2880 px wide, 2.4 MB | Resize to display size and test PNG vs WebP | Often 300-900 KB | Keeps UI text readable while removing oversized pixels |
| Product image set, mixed dimensions | Batch resize to consistent canvas and rename files | Consistent gallery assets | Improves UX and avoids layout jumps |
| Private profile photo | Crop square, resize to platform size, export locally | Small, clean profile image | Avoids uploading the original high-resolution photo |
Before-and-after examples should be treated as realistic ranges, not guarantees. Compression savings depend on the original image, noise, dimensions, format, and how much visual detail must be preserved. The workflow is still reliable: resize unnecessary pixels first, choose the format for the content, then adjust quality only as far as the use case allows.
Practical Workflow With Resizo Image Resizer
Open Resizo Image Resizer, add one representative file, and run a small test. Check the preview. If the output looks right, repeat the same settings on the full batch. For sensitive files, do this before sending images through email, forms, CMS uploads, or client portals. For public web assets, combine the export with descriptive filenames, useful alt text, and image dimensions in the HTML to reduce layout shifts.
When quality matters, compare at two zoom levels. First view the image at the actual size users will see it. Then inspect at 100 percent zoom for text, faces, product edges, and transparency. If it passes both checks, the file is usually ready.
External authority sources worth checking
| Source | Why it is useful | URL |
|---|---|---|
| MDN HTMLCanvasElement.toBlob | Explains how browser canvas exports image blobs, formats, and quality settings. | https://developer.mozilla.org/en-US/docs/Web/API/HTMLCanvasElement/toBlob |
| web.dev Learn Images | A practical reference for web image formats, responsive images, and performance. | https://web.dev/learn/images |
| Google Image SEO Best Practices | Google guidance for discoverable images, alt text, structured data, and fast image pages. | https://developers.google.com/search/docs/appearance/google-images |
| iLoveIMG pricing | Lists free and paid plans, task limits, file-size limits, and security-related plan details. | https://www.iloveimg.com/pricing |
| iLoveIMG privacy page | Links to iLoveIMG privacy information and describes its transparency commitments. | https://www.iloveimg.com/help/privacy |
Frequently Asked Questions
Is Resizo better than iLoveIMG?
Resizo is better for local no-upload resizing and quick private workflows. iLoveIMG is a broader cloud image suite. The right choice depends on whether privacy, file limits, or tool variety matters more.
Can I do this with Resizo Image Resizer?
Yes. Resizo Image Resizer is designed for this exact workflow. You can choose dimensions, format, and quality settings, then download an optimized copy without changing the original.
Does Resizo upload my images?
For supported Resizo browser tools, the image is processed locally in your browser. That means the original file stays on your device during resizing, compression, conversion, and preview.
What format should I choose?
Use WebP for most modern web pages, JPEG for broad photo compatibility, and PNG when you need transparency, sharp UI graphics, or exact screenshot detail.
Will reducing file size always reduce quality?
Not always in a visible way. If you reduce unnecessary pixels first and use sensible quality settings, the file can become much smaller while looking the same at normal viewing size.
What quality setting is best?
For photos, start around 75-85 and inspect the result. For screenshots or graphics, test PNG and WebP because ordinary photo compression can make text and edges look rough.
What are iLoveIMG free limits?
iLoveIMG lists limited processing on its Basic plan and higher processing/file-size limits on paid plans. Always check the current official pricing page before relying on a limit.
Should I delete the original after exporting?
No. Keep the original until the final image has been uploaded, reviewed, and approved. Store optimized exports in a separate folder so you can regenerate them later.
How do I avoid blurry output?
Do not upscale small files, keep aspect ratio locked, export from the original, and check the result at 100 percent zoom before using it in production.
Is this good for SEO?
Yes when combined with fast file sizes, descriptive filenames, useful alt text, proper HTML image elements, and relevant page content near the image.
Conclusion
Resizo vs iLoveIMG: Privacy, Speed, Limits, and Best Use Cases is not about chasing a magic compression number. It is about choosing the safest and most useful output for the job. Start with the destination, resize pixels before lowering quality, choose the correct format, and protect private originals. Resizo Image Resizer gives you a fast local workflow for doing that without turning a simple image task into an upload-heavy process.
Use Resizo when you want practical control: dimensions, format, quality, privacy, and batch speed. Use competitor or cloud tools only when their specific features are worth the upload and account workflow for your use case.
Solve it with Resizo Image Resizer
choose Resizo when privacy, no upload, quick resizing, and direct format control matter more than a large multi-tool cloud suite
Try Resizo Free