Se você está procurando Resizo vs TinyPNG, você provavelmente não precisará de outra lista vaga de ferramentas. Você precisa de um fluxo de trabalho prático que resolva um problema real: o TinyPNG é forte para compactação automatizada, mas muitos usuários também precisam de redimensionamento, privacidade sem upload e controle de saída ajustável. Este guia explica como tomar a decisão correta sobre a imagem, como usar o Resizo Image Compressor e Resizer e como evitar os erros que prejudicam silenciosamente a qualidade, a privacidade ou a velocidade da página.
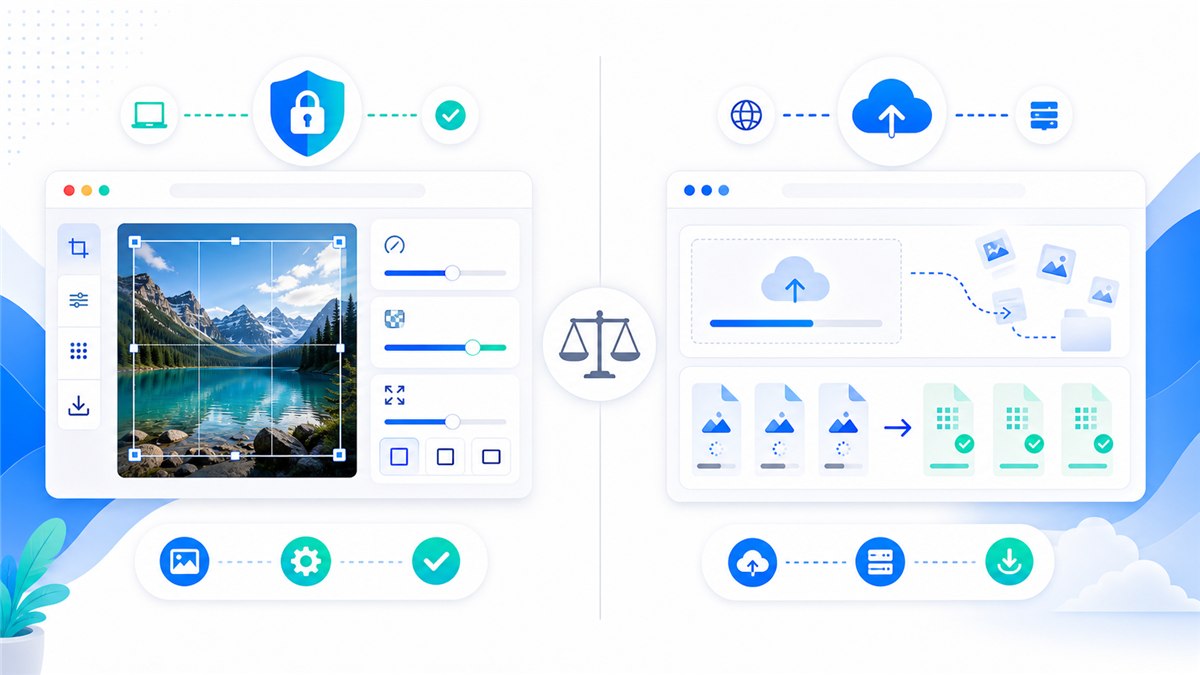
Tabela de comparação TinyPNG vs Resizo
| Ponto de decisão | Ajuda | Minúsculo PNG |
|---|---|---|
| Modelo de processamento | Redimensionamento e compactação local no navegador | Compressão e conversão em nuvem baseada em upload |
| Melhor ajuste | Redimensionar e compactar sem upload | Compressão dedicada quando o processamento em nuvem é aceitável |
| Limites grátis | O limite prático é a memória do navegador/dispositivo | Tinify lista 20 compactações gratuitas por sessão e 5 MB por imagem no Web Free |
| Controle de saída | Escolha dimensões, formato e qualidade juntos | O nível de compressão é escolhido automaticamente pelo Tinify |
| Ângulo de privacidade | As imagens originais permanecem no dispositivo para tarefas locais | Os termos do Tinify descrevem o armazenamento temporário de imagens para prestação de serviços |
Essa comparação não pretende transformar cada fluxo de trabalho em uma escolha em que o vencedor leva tudo. O TinyPNG pode ser útil quando seu fluxo de trabalho em nuvem, automação ou conjunto de recursos atende às suas necessidades. Resizo é o melhor padrão quando a imagem original deve permanecer no seu dispositivo, quando você precisa de dimensões exatas antes da compactação ou quando deseja um resultado rápido sem atrito de conta.
Introdução
Resizo vs TinyPNG: compactação, privacidade, formatos e limites são importantes porque o trabalho de imagem raramente é apenas uma tarefa estética. Uma única foto grande demais pode tornar um site lento, falhar no upload de um formulário, expor conteúdo privado ou criar galerias de produtos inconsistentes. Uma única exportação supercomprimida pode fazer com que os rostos pareçam cerosos, o texto ilegível e os gráficos da marca pouco profissionais.
A melhor abordagem é simples: comece com o destino real, defina primeiro as dimensões em pixels, escolha um formato que se ajuste ao conteúdo, exporte uma vez e inspecione o resultado antes de publicar ou compartilhar. Resizo é construído em torno desse fluxo de trabalho. Ele executa operações de imagem comuns no navegador, o que significa que as tarefas suportadas de redimensionamento, compactação, conversão e visualização podem ocorrer localmente, em vez de exigir um pipeline de upload primeiro.
Para arquivos confidenciais, o processamento local é especialmente importante. As imagens privadas podem conter rostos, locais, documentos, protótipos de produtos, capturas de tela internas ou metadados. Mesmo quando um serviço em nuvem é legítimo, o modelo de privacidade é diferente de um fluxo de trabalho local no navegador. O hábito mais seguro é evitar o upload de originais, a menos que o upload seja necessário e você confie nos termos do serviço.
O que é Resizo vs TinyPNG: compactação, privacidade, formatos e limites?
Resizo vs TinyPNG: compactação, privacidade, formatos e limites é o processo de transformar uma imagem original em uma saída mais segura, menor e mais adequada para um destino específico. O destino pode ser um herói de site, galeria de produtos de comércio eletrônico, formulário de candidatura de emprego, anexo de e-mail, perfil social, captura de tela de documentação ou avaliação interna de um cliente.
Em termos práticos, o fluxo de trabalho inclui quatro decisões: dimensões, formato, qualidade e privacidade. As dimensões decidem quantos pixels a imagem final contém. O formato decide se o arquivo deve ser JPEG, PNG, WebP ou outro tipo. A qualidade controla a compensação entre compactação e detalhes visuais. A privacidade decide se a imagem original deve permanecer no dispositivo ou ser carregada em um processador em nuvem.
Os navegadores modernos oferecem suporte à exportação de imagens por meio de APIs da web. Documentos MDN exportados por tela podem criar blobs de imagem e formatos como PNG são necessários, enquanto JPEG e WebP são amplamente suportados por muitos navegadores. É por isso que as ferramentas que priorizam o navegador podem lidar com muitas tarefas diárias de imagem sem uma viagem de ida e volta ao servidor.
Por que é importante
Erros de imagem são caros porque são fáceis de ignorar. O proprietário de um site pode fazer upload de uma foto de telefone de 5 MB e se perguntar por que a página parece lenta. Um aluno pode compactar uma imagem de identificação até que o texto se torne ilegível. Um vendedor pode fazer upload de fotos de produtos com colheitas incompatíveis e fazer com que todo o catálogo pareça menos confiável. Um freelancer pode enviar imagens de clientes por meio de uma ferramenta aleatória porque foi o primeiro resultado da pesquisa.
escolha Resizo quando desejar redimensionamento local mais compactação em um fluxo de trabalho de navegador. Esse é o principal motivo para usar um fluxo de trabalho focado em vez de adivinhar. O objetivo não é perseguir o menor número possível. O objetivo é criar um arquivo que seja pequeno o suficiente, claro o suficiente, dimensionado corretamente e apropriado para o nível de privacidade do conteúdo.
A Central de Pesquisa do Google também recomenda o uso de elementos de imagem HTML padrão, texto alternativo útil, formatos suportados, dados estruturados e páginas de imagem otimizadas para velocidade e qualidade. Em outras palavras, a otimização de imagens não é apenas uma tarefa de design. Afeta a acessibilidade, a visibilidade da pesquisa, a confiança do usuário e a conversão.
Principais benefícios
- Você reduz o desperdício de tempo de upload porque a compactação local da imagem e a comparação de redimensionamento acontecem antes que o arquivo chegue a um site, formulário ou CMS.
- Você torna a saída previsível: dimensões exatas, tamanho de arquivo razoável e um formato adequado ao destino.
- Você protege a imagem original exportando uma cópia otimizada separada em vez de editar a única versão que possui.
- Você evita danos comuns à qualidade, como proporções ampliadas, compactação repetida e aumento de escala desnecessário.
- Você cria imagens que são mais fáceis de serem baixadas pelos usuários e mais fáceis de serem entendidas pelos mecanismos de pesquisa quando combinadas com bons nomes de arquivo e texto alternativo.
Para proprietários de sites, blogueiros, vendedores de comércio eletrônico, desenvolvedores e equipes de conteúdo, o maior benefício geralmente é o controle. Você decide o que sai do dispositivo, o que é redimensionado, qual formato é exportado e qual nível de qualidade é aceitável. Esse controle é difícil de obter quando cada pequena tarefa de imagem começa com um upload obrigatório e uma exportação de caixa preta.
Guia passo a passo
- Decida o que é mais importante: privacidade, taxa de compactação, dimensões exatas, tamanho do lote ou variedade de ferramentas.
- Teste a mesma imagem original no Resizo Image Compressor and Resizer e no TinyPNG para comparar a saída real em vez das afirmações.
- Verifique as dimensões finais em pixels, formato e tamanho do arquivo. Um arquivo menor não será automaticamente melhor se estiver desfocado ou cortado incorretamente.
- Abra a saída com zoom de 100% e inspecione faces, texto, bordas do produto, áreas transparentes e gradientes de cores.
- Para arquivos privados ou de cliente, prefira o fluxo de trabalho local Resizo para que os originais permaneçam no dispositivo durante o redimensionamento e a compactação.
- Para ativos públicos onde a compactação automatizada máxima é importante, compare a saída do TinyPNG com uma exportação Resizo WebP ou JPEG.
- Mantenha os arquivos originais em uma pasta separada e exporte uma cópia pronta para a Web com nome claro.
Configurações recomendadas
| Caso de uso | Formato/ferramenta recomendado | Alvo de tamanho | Melhores práticas |
|---|---|---|---|
| Logotipo transparente | Mantenha PNG se a transparência precisar permanecer exata | Pixels originais ou tamanho de exibição 2x | PNG sem perdas primeiro; WebP somente após verificação visual |
| Captura de tela da IU | PNG ou WebP | 1200-1600 pixels de largura | Mantenha o texto nítido; evite exportações repetidas de JPEG |
| Recorte do produto | PNG ou WebP com alfa | Tamanho do mercado ou mestre de 2.000 px | Verifique as bordas em fundos brancos e escuros |
| Ícone do site | SVG, se possível, substituto PNG | 2x tamanho renderizado | Use nomes de arquivo descritivos e texto alternativo próximos |
Estas configurações são pontos de partida e não leis. Retrato, captura de tela, logotipo transparente e foto de produto do mercado se comportam de maneira diferente. Sempre teste alguns arquivos representativos antes de processar uma pasta grande.
Melhores práticas
- Comece com o original da mais alta qualidade que você possui. Redimensionar uma cópia incorreta geralmente amplifica os bloqueios de desfoque e compactação.
- Defina dimensões antes da qualidade. A contagem de pixels geralmente é o maior fator no tamanho do arquivo.
- Use um passe de exportação. Reabrir e recomprimir a mesma saída repetidas vezes causa danos visíveis.
- Mantenha um pequeno conjunto de testes com diferentes tipos de imagens: retrato, produto, captura de tela, foto escura e gráfico transparente.
- Use nomes descritivos como resized-passport-photo.jpg ou product-main-1200.webp em vez de IMG_4829-final-final.jpg.
- Mantenha o arquivo exportado próximo à cópia relevante na página e use um texto alternativo natural, seguindo as orientações de SEO de imagens do Google.
Um hábito especializado faz uma grande diferença: nomear o resultado com base no propósito, não no humor. Um arquivo chamado página inicial-hero-1600.webp diz a um futuro editor exatamente o que é. Um arquivo chamado final-novo-2.jpg não lhes diz nada e geralmente leva à duplicação do trabalho.
Erros Comuns
- Carregar fotos confidenciais para uma ferramenta antes de verificar como o serviço processa e armazena arquivos.
- Forçar uma largura e altura fixas que distorcem pessoas, produtos, logotipos ou documentos.
- Aumentar a escala de uma pequena imagem de origem e esperar que detalhes verdadeiros apareçam. O upscaling pode ampliar pixels, mas não pode recriar informações ausentes.
- Usando PNG para cada foto. PNG é excelente para transparência e gráficos nítidos, mas as fotos geralmente ficam desnecessariamente grandes.
- Ignorando o caso de uso final. Um master com qualidade de impressão e uma visualização rápida da web são arquivos diferentes com requisitos diferentes.
- Excluir originais muito cedo. Sempre mantenha os arquivos de origem até que o conjunto otimizado esteja ativo e verificado.
O erro mais comum é otimizar para a métrica errada. O menor arquivo nem sempre é o melhor arquivo. O melhor arquivo é aquele que carrega rapidamente, olha exatamente para o tamanho que os usuários o veem, atende aos requisitos de destino e não expõe mais informações privadas do que o necessário.
Dicas avançadas
- Crie duas exportações para ativos importantes da web: um mestre de 1.600 px para telas grandes e uma versão menor de 800 px para miniaturas ou cartões.
- Para comércio eletrônico, faça um corte consistente e um plano de fundo como parte do processo antes da compactação. A consistência visual geralmente é tão importante quanto o tamanho do arquivo.
- Para capturas de tela, teste PNG e WebP. Capturas de tela com muito texto podem parecer piores se compactadas como fotos comuns.
- Para formulários com limites rígidos de KB, redimensione as dimensões primeiro e depois diminua a qualidade gradualmente em pequenos passos.
- Para fluxos de trabalho privados, carregue a ferramenta, desconecte-se da Internet e conclua o processamento local após a página ser aberta.
- Documente suas configurações preferidas para que os membros da equipe exportem sempre da mesma maneira.
Se você gerencia um fluxo de trabalho recorrente, crie uma pequena planilha interna predefinida. Inclua a largura alvo, formato de saída, faixa de qualidade, padrão de nomenclatura e lista de verificação de revisão. Essa planilha economiza mais tempo do que adivinhar as configurações sempre que chega um novo lote.
Exemplos reais e casos de uso
| Cenário | Problema | Fluxo de trabalho Resizo recomendado |
|---|---|---|
| Proprietário do site | Uma imagem de blog de 2.400 px precisa se tornar um WebP de 1.400 px e permanecer privada até ser publicada. | Use Resizo para redimensionar e compactar localmente e compare com TinyPNG somente se a compactação em nuvem for aceitável. |
| Desenvolvedora | Uma pasta de capturas de tela PNG deve ser preparada para documentação. | Use Resizo para redimensionar capturas de tela, testar PNG versus WebP e manter os rótulos legíveis. |
| Profissional de marketing | Vinte imagens de campanhas públicas precisam de compactação máxima rapidamente. | TinyPNG pode ser conveniente, enquanto Resizo é melhor quando as dimensões também precisam ser alteradas. |
Exemplos de antes e depois
| Antes | Ação | Resultado típico | Por que funciona |
|---|---|---|---|
| Foto do telefone, 4032 x 3024, 4,8 MB | Redimensione para 1600 px de largura e exporte WebP/JPEG com qualidade 80 | Frequentemente 250-700 KB | Melhor para blogs, portfólios e uploads básicos da web |
| Captura de tela PNG, 2880 px de largura, 2,4 MB | Redimensione para exibir o tamanho e teste PNG vs WebP | Frequentemente 300-900 KB | Mantém o texto da UI legível enquanto remove pixels grandes |
| Conjunto de imagens do produto, dimensões mistas | Redimensionar em lote para tela consistente e renomear arquivos | Ativos de galeria consistentes | Melhora a UX e evita saltos de layout |
| Foto de perfil privado | Cortar quadrado, redimensionar para o tamanho da plataforma, exportar localmente | Imagem de perfil pequena e limpa | Evita enviar a foto original em alta resolução |
Os exemplos de antes e depois devem ser tratados como intervalos realistas e não como garantias. A economia de compactação depende da imagem original, do ruído, das dimensões, do formato e da quantidade de detalhes visuais que devem ser preservados. O fluxo de trabalho ainda é confiável: primeiro redimensione os pixels desnecessários, escolha o formato do conteúdo e depois ajuste a qualidade apenas na medida em que o caso de uso permitir.
Fluxo de trabalho prático com compressor e redimensionador de imagem Resizo
Abrir Compressor e redimensionador de imagem Resizo, adicione um arquivo representativo e execute um pequeno teste. Confira a prévia. Se a saída parecer correta, repita as mesmas configurações em todo o lote. Para arquivos confidenciais, faça isso antes de enviar imagens por e-mail, formulários, uploads de CMS ou portais de clientes. Para ativos públicos da web, combine a exportação com nomes de arquivos descritivos, texto alternativo útil e dimensões de imagem no HTML para reduzir mudanças de layout.
Quando a qualidade é importante, compare em dois níveis de zoom. Primeiro veja a imagem no tamanho real que os usuários verão. Em seguida, inspecione com zoom de 100% o texto, as faces, as bordas do produto e a transparência. Se passar nas duas verificações, o arquivo geralmente estará pronto.
Fontes de autoridade externa que vale a pena verificar
| Fonte | Por que é útil | URL |
|---|---|---|
| MDN HTMLCanvasElement.toBlob | Explica como a tela do navegador exporta blobs de imagens, formatos e configurações de qualidade. | https://developer.mozilla.org/en-US/docs/Web/API/HTMLCanvasElement/toBlob |
| web.dev Aprenda imagens | Uma referência prática para formatos de imagens da web, imagens responsivas e desempenho. | https://web.dev/learn/images |
| Práticas recomendadas de SEO para imagens do Google | Orientação do Google para imagens detectáveis, texto alternativo, dados estruturados e páginas de imagens rápidas. | https://developers.google.com/search/docs/appearance/google-images |
| Ferramenta web Tinify e limites | Descreve a compactação Tinify/TinyPNG, formatos suportados, declaração de segurança e limites da web gratuita. | https://tinify.com/web |
| Preços da web Tinify | Mostra limites gratuitos, Pro e Ultra, incluindo tamanho de upload e limites de conversão de sessão. | https://tinify.com/web/pricing |
| Termos Tinify e processamento de dados | Explica práticas de armazenamento temporário e processamento de dados para imagens carregadas. | https://tinify.com/terms |
Perguntas frequentes
Resizo é melhor que TinyPNG?
Nenhuma das ferramentas é universalmente melhor. TinyPNG é forte para compactação automatizada baseada em upload. Resizo é melhor quando você precisa de redimensionamento local sem upload, dimensões exatas e controle de formato no mesmo fluxo de trabalho.
Posso faz isso com o Resizo Image Compressor e Resizer?
Sim. Resizo Image Compressor and Resizer foi projetado exatamente para esse fluxo de trabalho. Você pode escolher dimensões, formato e configurações de qualidade e, em seguida, baixar uma cópia otimizada sem alterar o original.
Resizo carrega minhas imagens?
Para ferramentas de navegador Resizo compatíveis, a imagem é processada localmente em seu navegador. Isso significa que o arquivo original permanece no seu dispositivo durante o redimensionamento, compactação, conversão e visualização.
Qual formato devo escolher?
Use WebP para a maioria das páginas da web modernas, JPEG para ampla compatibilidade de fotos e PNG quando precisar de transparência, gráficos de interface de usuário nítidos ou detalhes exatos de captura de tela.
Reduzir o tamanho do arquivo sempre reduzirá a qualidade?
Nem sempre de forma visível. Se você reduzir pixels desnecessários primeiro e usar configurações de qualidade sensatas, o arquivo poderá ficar muito menor e ter a mesma aparência no tamanho normal de visualização.
Qual configuração de qualidade é melhor?
Para fotos, comece por volta de 75-85 e inspecione o resultado. Para capturas de tela ou gráficos, teste PNG e WebP porque a compactação comum de fotos pode fazer com que o texto e as bordas pareçam ásperos.
Quais são os limites gratuitos do TinyPNG?
O Tinify lista 20 compactações por sessão e 5 MB por imagem em seu plano Web Free, com limites mais altos em planos web pagos. Verifique a página de preços porque os limites podem mudar.
Devo excluir o original após exportar?
Não. Mantenha o original até que a imagem final seja carregada, revisada e aprovada. Armazene as exportações otimizadas em uma pasta separada para que você possa regenerá-las mais tarde.
Como evito uma saída borrada?
Não aprimore arquivos pequenos, mantenha a proporção bloqueada, exporte do original e verifique o resultado com zoom de 100% antes de usá-lo na produção.
Isso é bom para SEO?
Sim, quando combinado com tamanhos de arquivo rápidos, nomes de arquivos descritivos, texto alternativo útil, elementos de imagem HTML adequados e conteúdo de página relevante próximo à imagem.
Conclusão
Resizo vs TinyPNG: compactação, privacidade, formatos e limites não se trata de perseguir um número mágico de compactação. Trata-se de escolher o resultado mais seguro e útil para o trabalho. Comece com o destino, redimensione os pixels antes de diminuir a qualidade, escolha o formato correto e proteja os originais privados. Resizo Image Compressor and Resizer oferece um fluxo de trabalho local rápido para fazer isso sem transformar uma tarefa simples de imagem em um processo de upload pesado.
Use o Resizo quando quiser controle prático: dimensões, formato, qualidade, privacidade e velocidade do lote. Use ferramentas concorrentes ou de nuvem somente quando seus recursos específicos valerem o upload e o fluxo de trabalho da conta para seu caso de uso.
Resolva com Resizo Image Compressor e Resizer
escolha Resizo quando desejar redimensionamento local e compactação em um fluxo de trabalho de navegador
Experimente Resizo grátis